
How to Live Connect Your Shopify Store - Vendor
This article provides a step-by-step guide to installing the Marketcube application in a vendor’s live-connected Shopify store.
Before we begin, let’s quickly understand what Vendor Live Connect is and how it simplifies marketplace management.
What is Vendor Live Connect?
Vendor Live Connect enables your vendors to link their existing online stores directly to their Marketcube account, ensuring a seamless integration between their live store and your marketplace.
This connection allows automatic synchronization of inventory and order data in real-time between vendors and operators making multivendor marketplace management effortless and efficient.
About This Guide:-
In this guide, we’ll walk you through how a vendor can live-connect their Shopify store in just a few simple steps. You can choose to either watch our step-by-step video walkthrough above or follow the detailed written instructions below to set up Vendor Live Connect. Both options will guide you through linking your live Shopify store to Marketcube for real-time inventory and order synchronization.
Let’s get started!
Ensure you’re logged in to both your Vendor Marketcube account and your Shopify Admin Panel. You’ll need access to both platforms to complete the setup steps smoothly.
Click on the link to watch the complete video guide to connect your Shopify store:
Shopify Live Connect Video Guide
Follow these steps to connect your Shopify store:
-
From your Vendor Marketcube dashboard, navigate to Products from the top menu.
Once you’re on the Products page, click Store Settings and select Connect Shop from the dropdown.
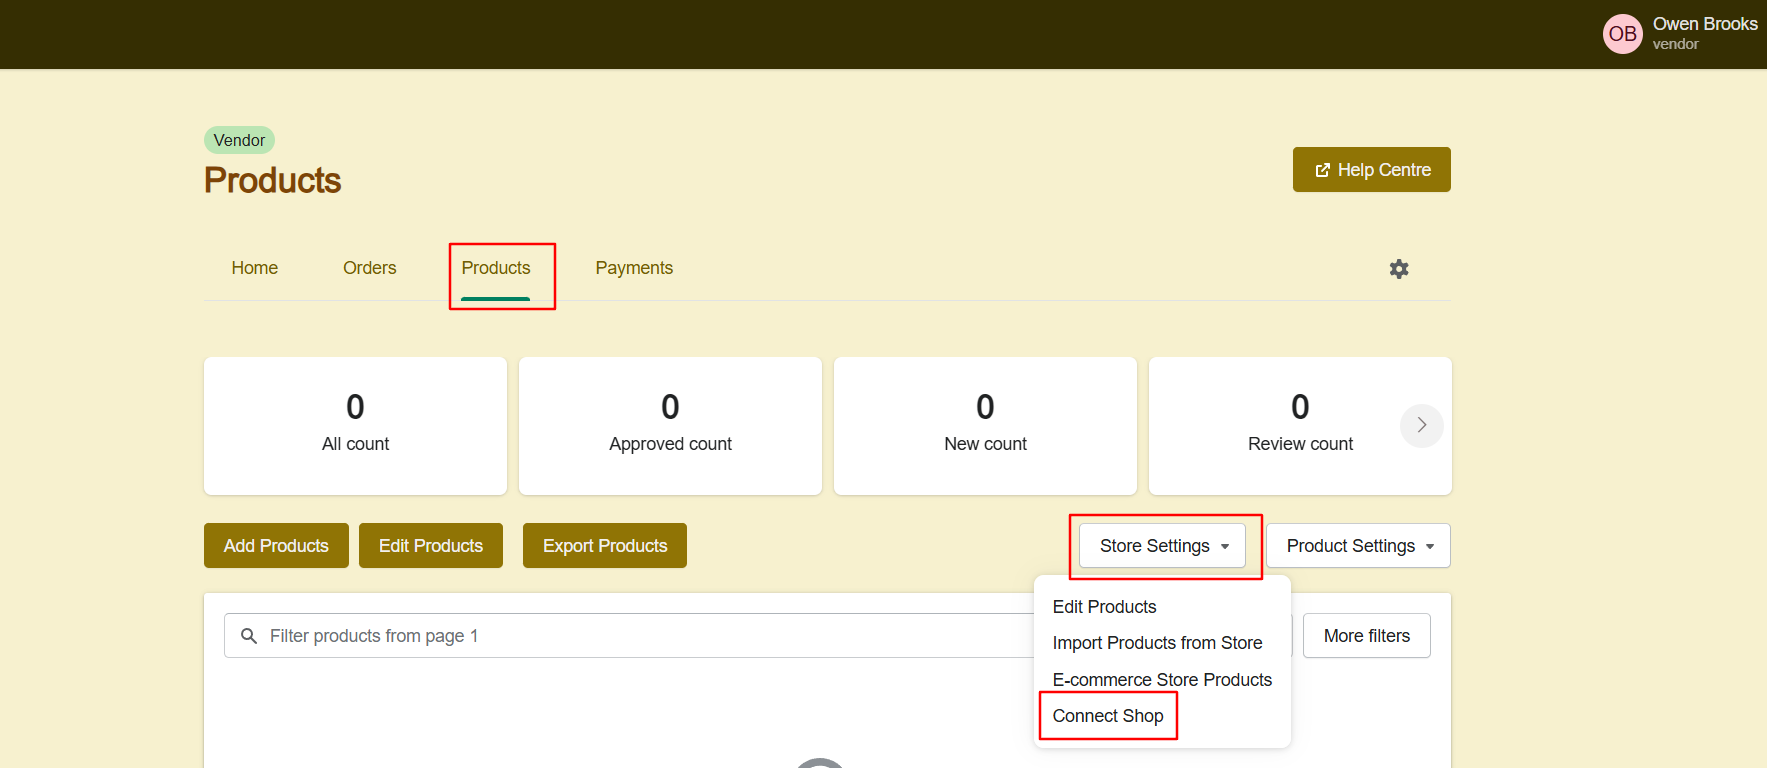
- You’ll be redirected to a new screen where Shopify will already be selected as your store type.
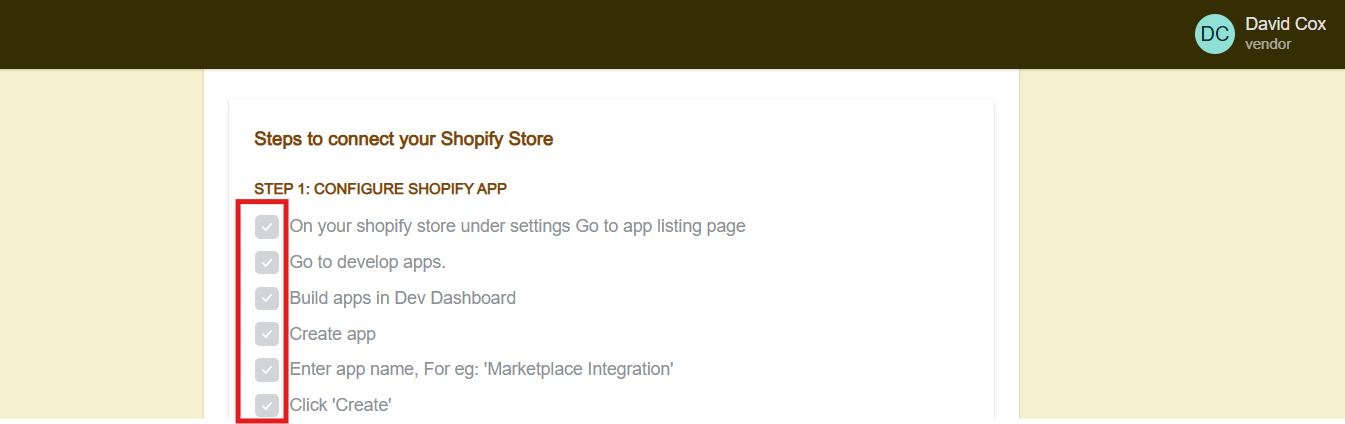
On this page, you’ll see a checklist of setup steps. These steps will be completed during the Shopify setup process, where you’ll install the app and generate the required credentials, such as the Client ID and Secret Key, to complete the live connect.
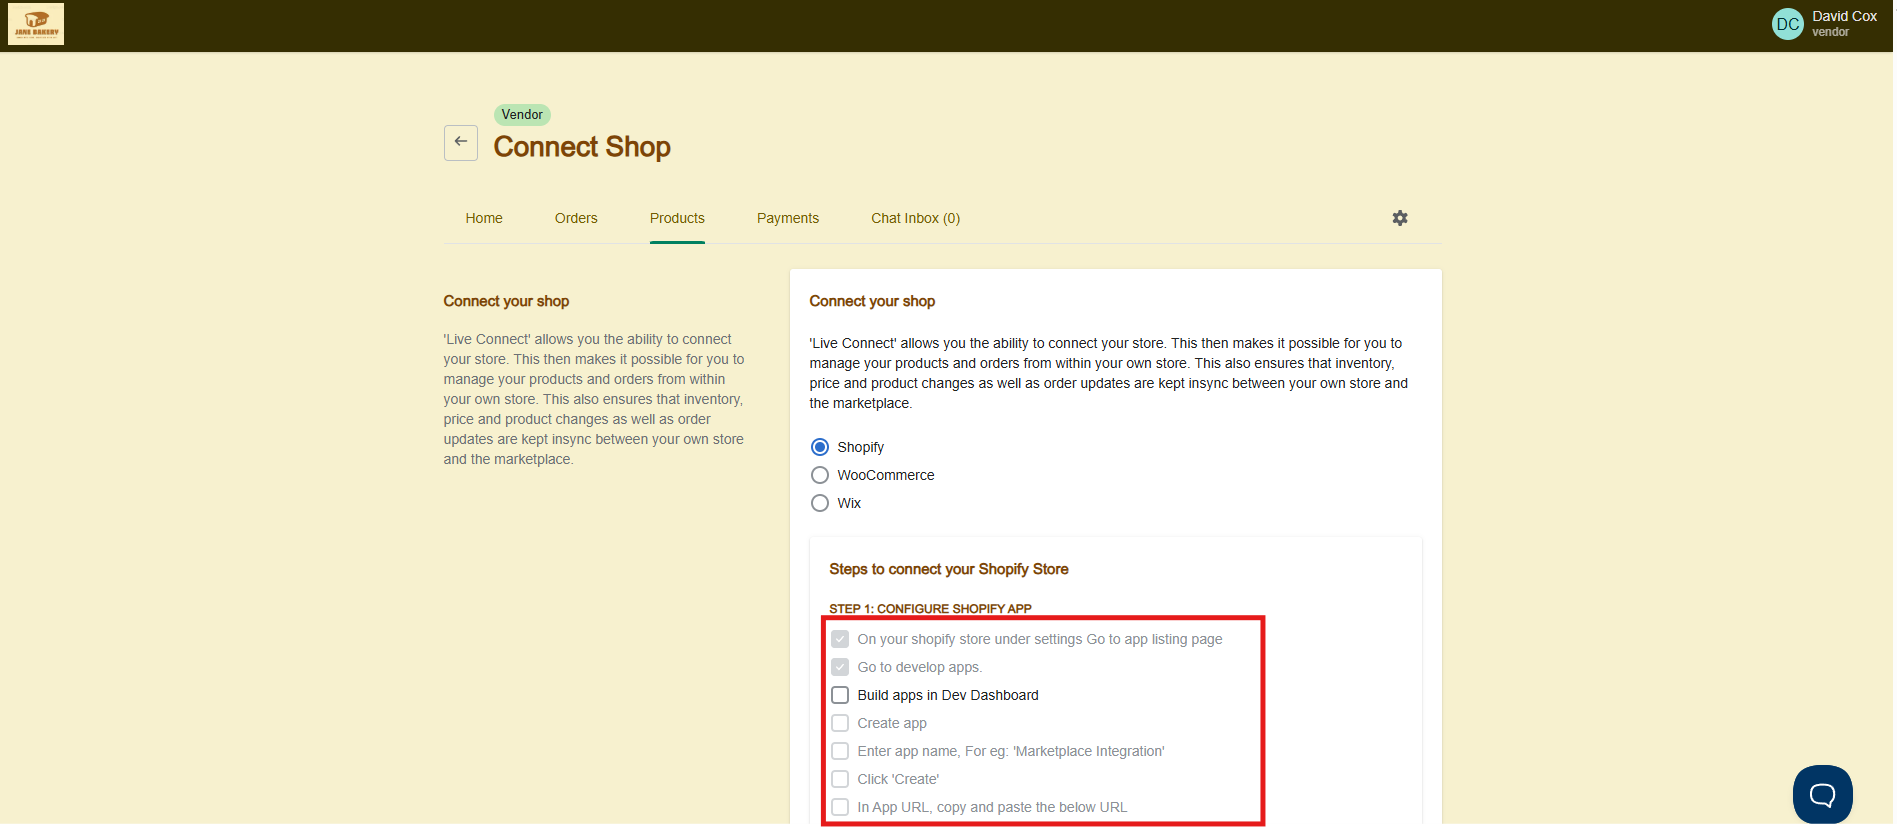
Let's now follow these instructions one by one starting from your Marketcube account and moving to Shopify, to begin the Shopify Live Connect setup process.
(A) Step 1: Configure Shopify App
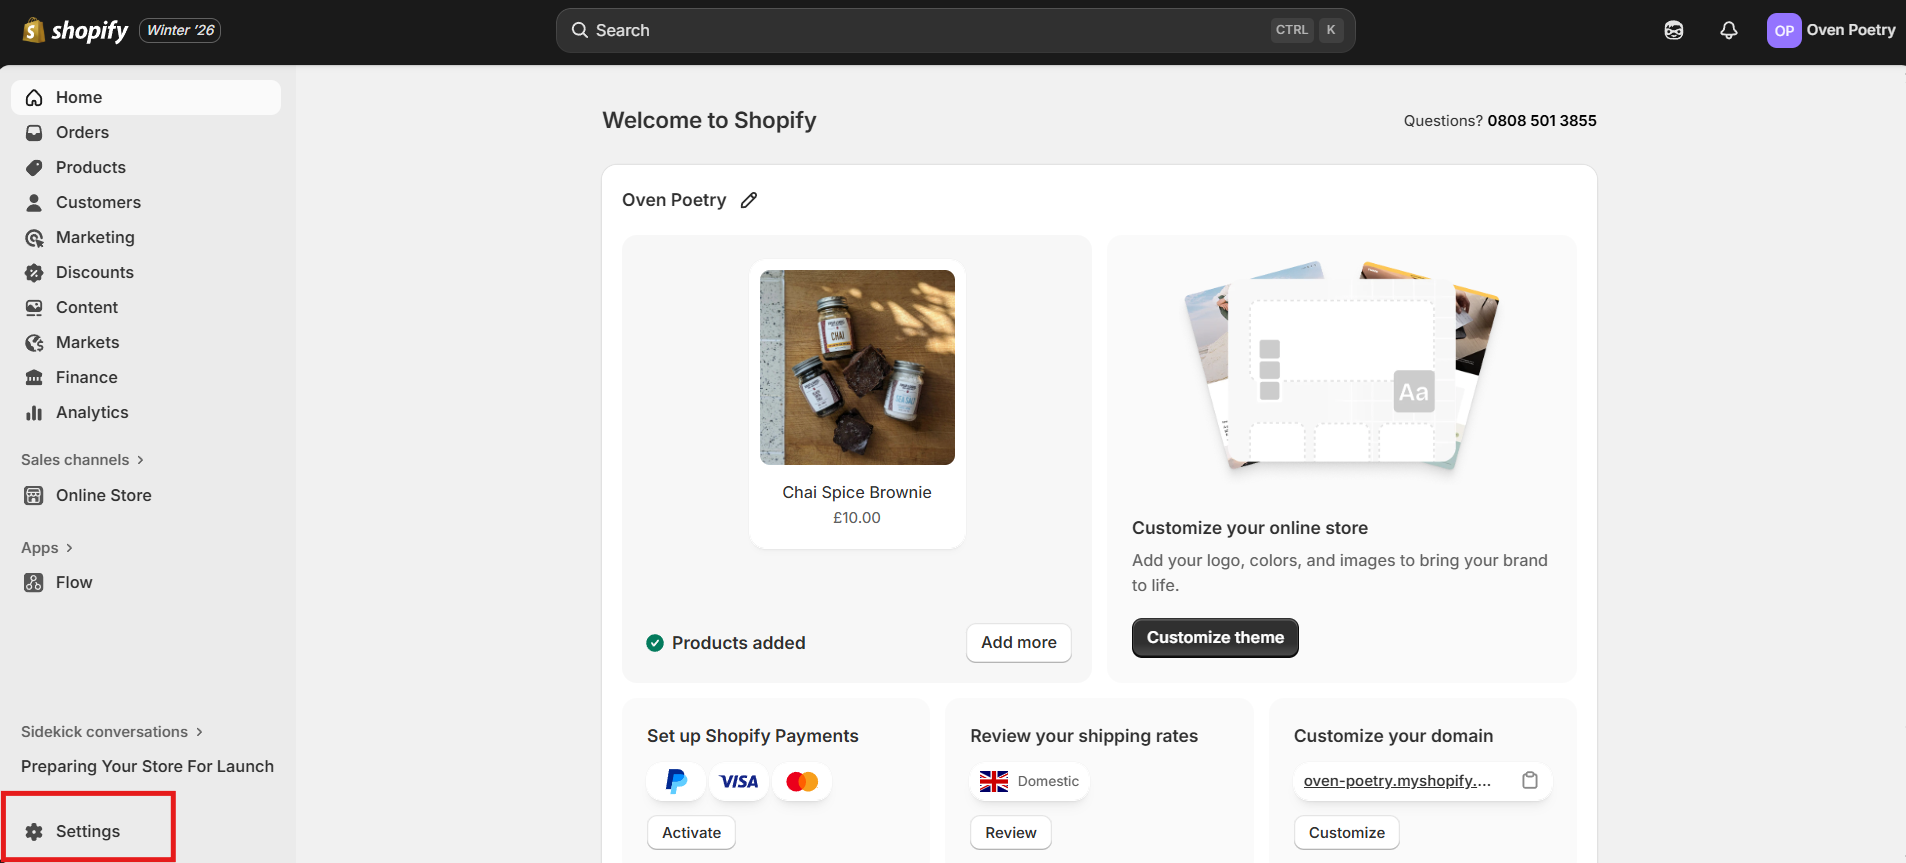
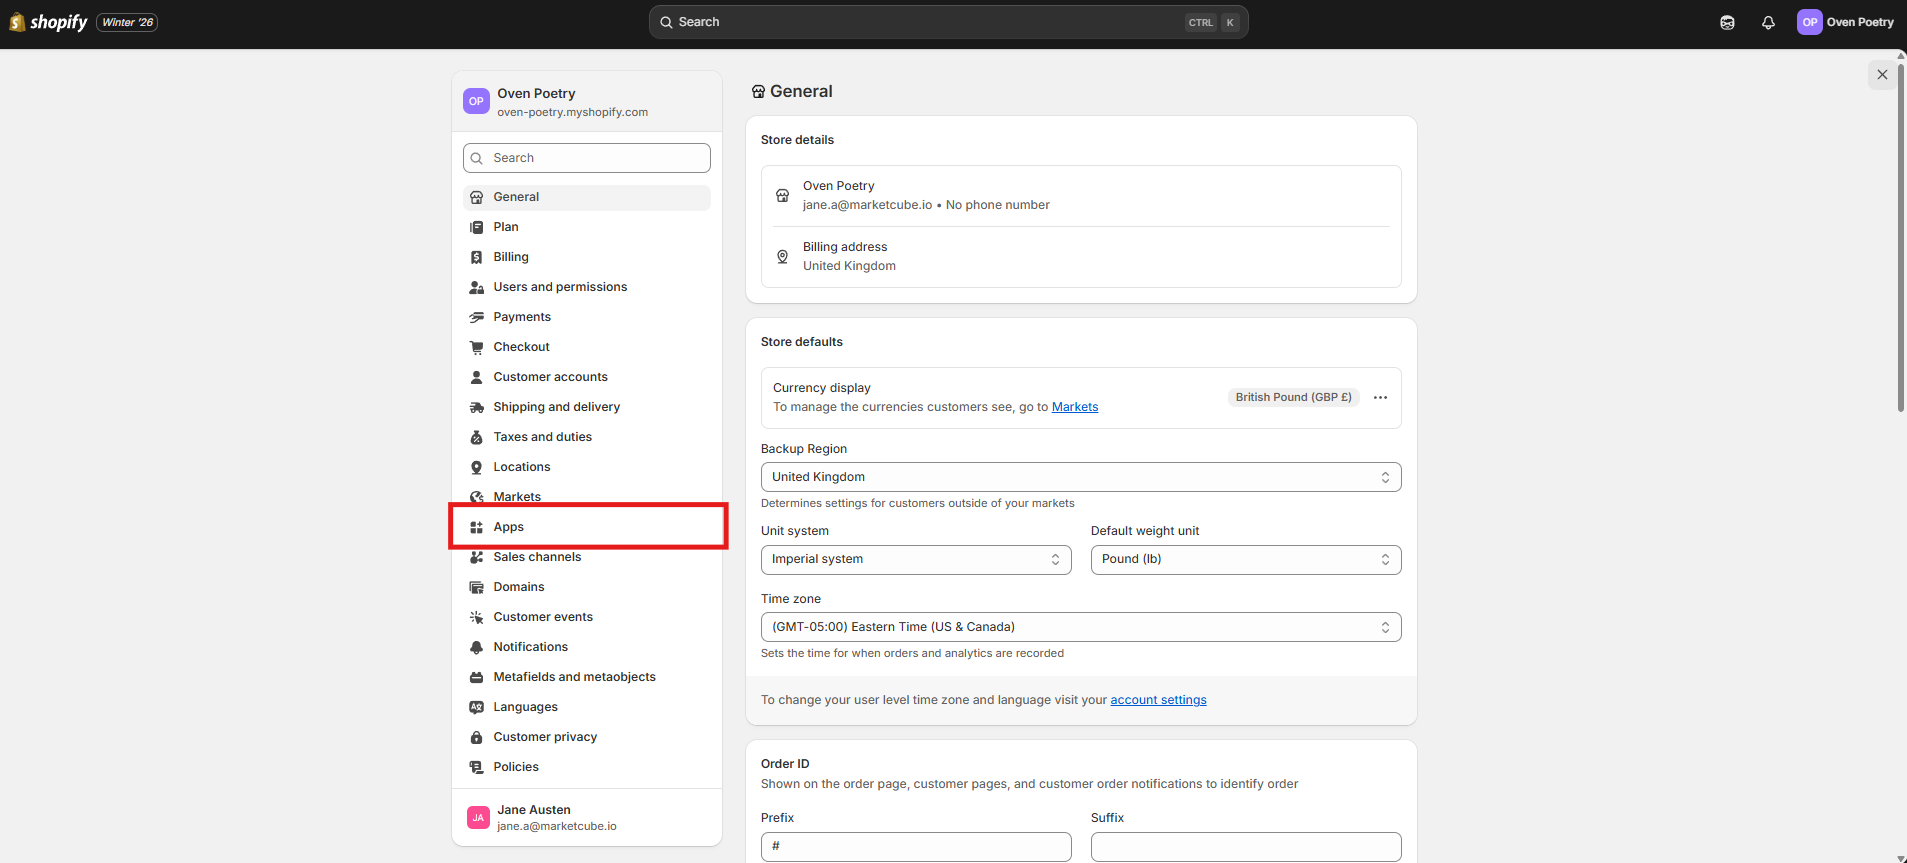
- From your Shopify Admin Panel, navigate to the left-hand menu and click Settings
- In the Settings window, select Apps, this will open a new drawer window
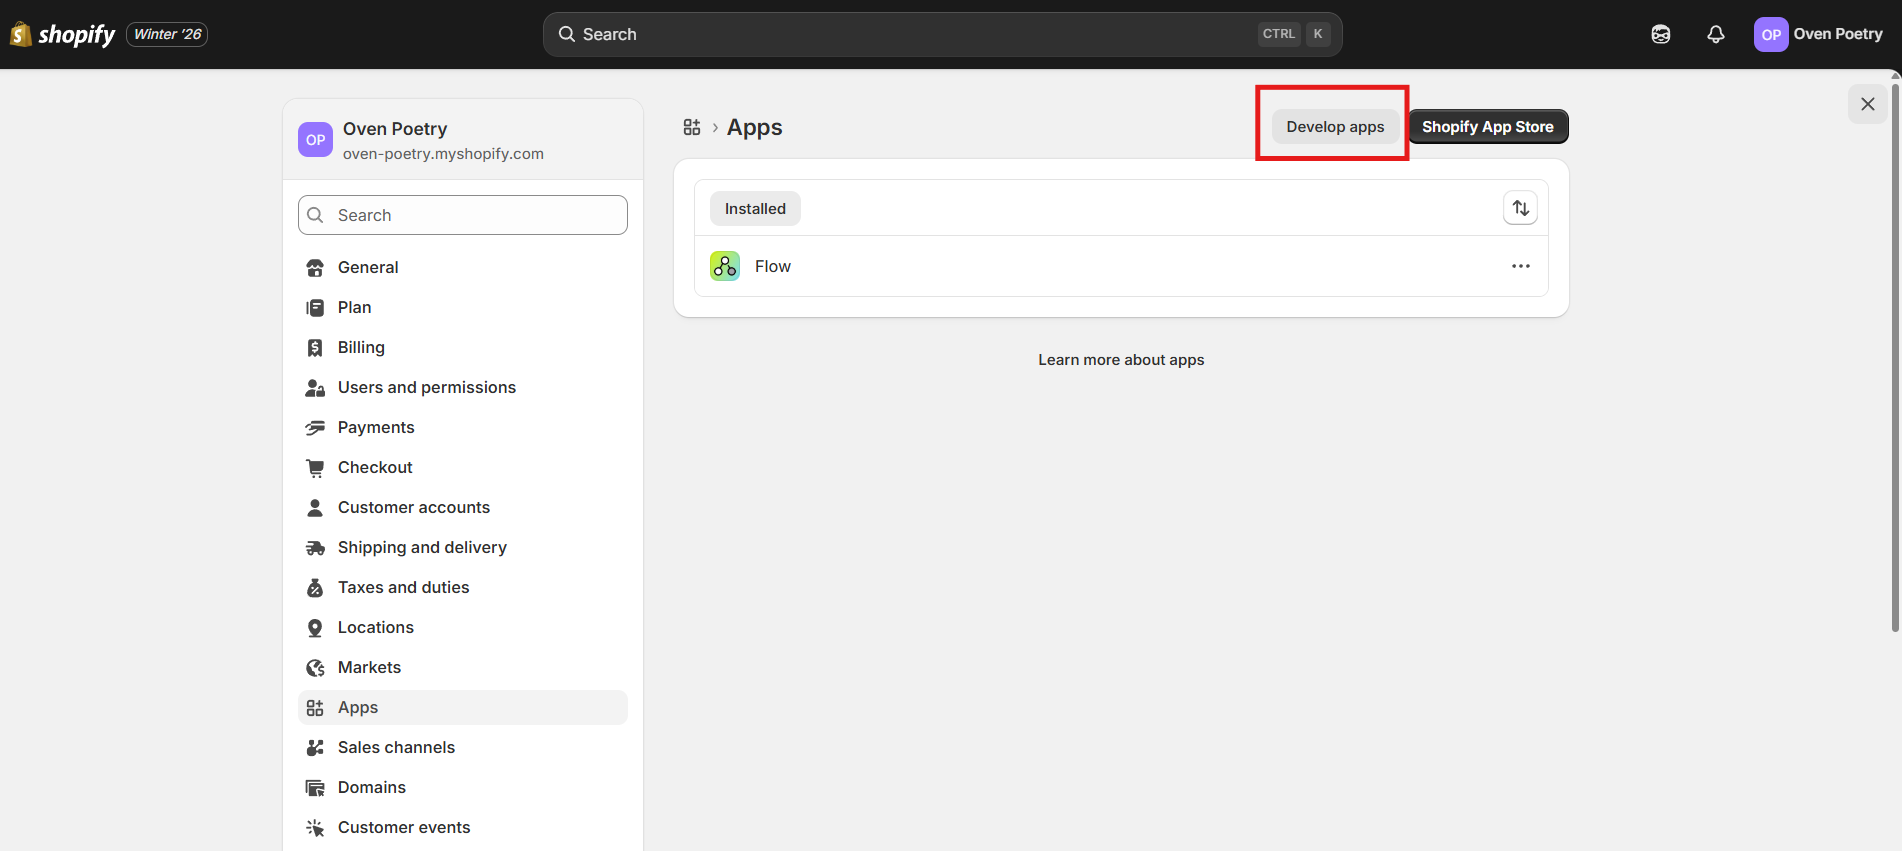
- Click on the Develop apps button.
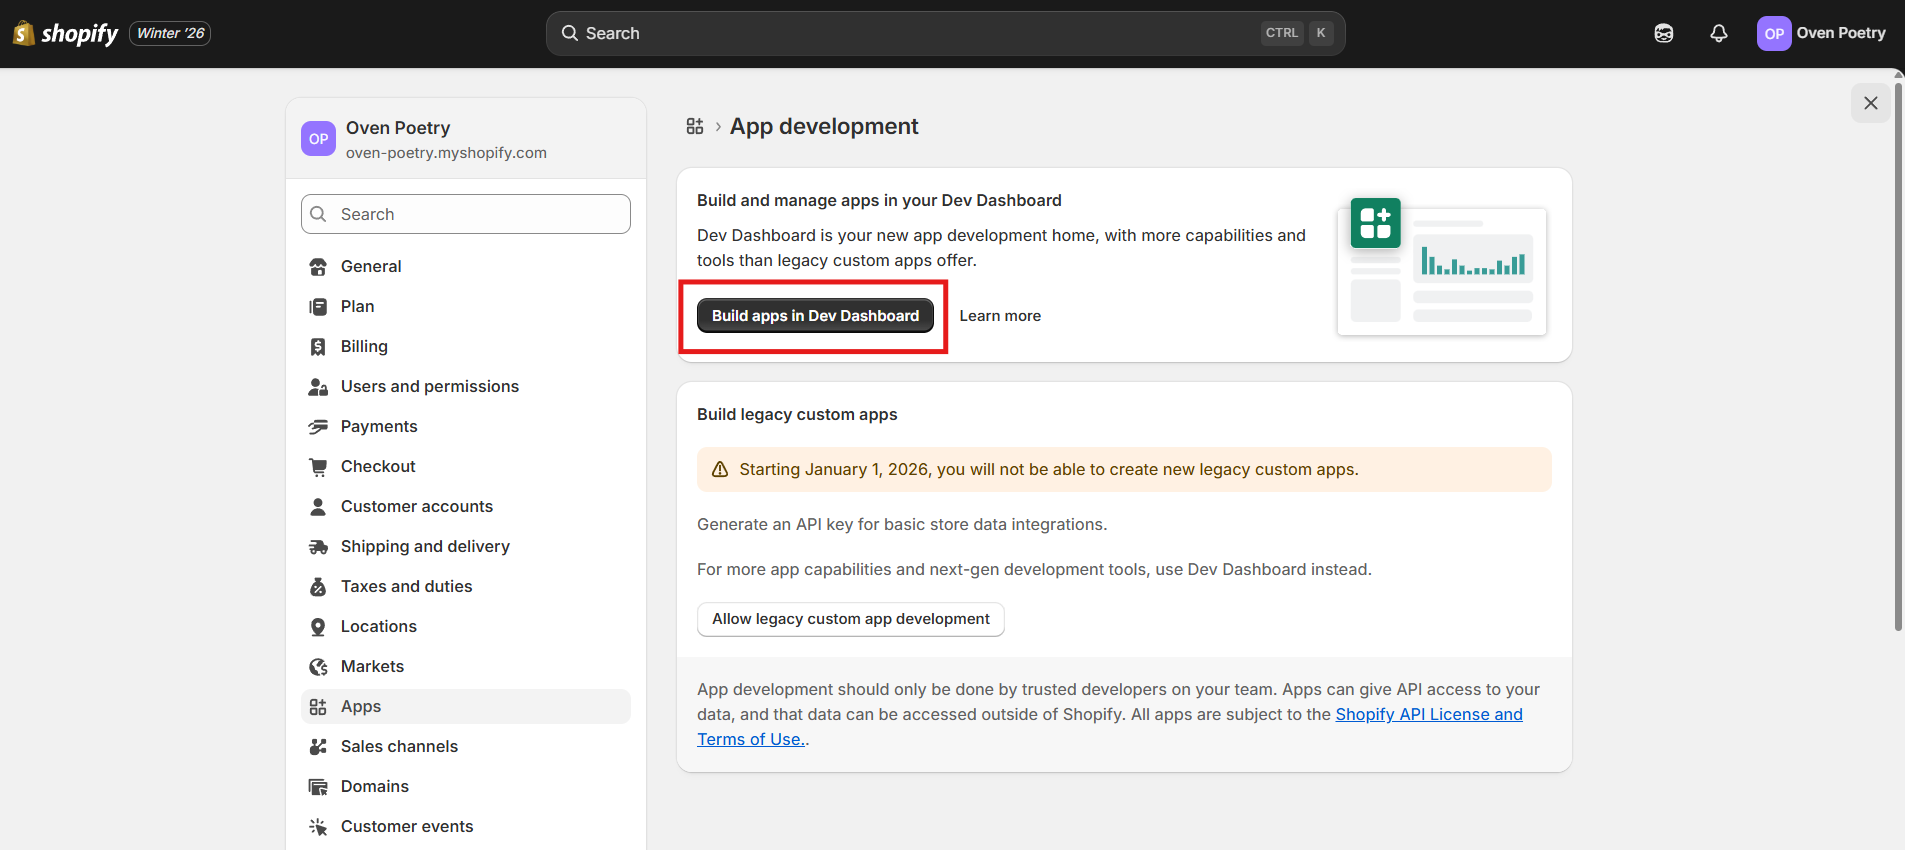
- On the next screen, select Build apps in Dev Dashboard.
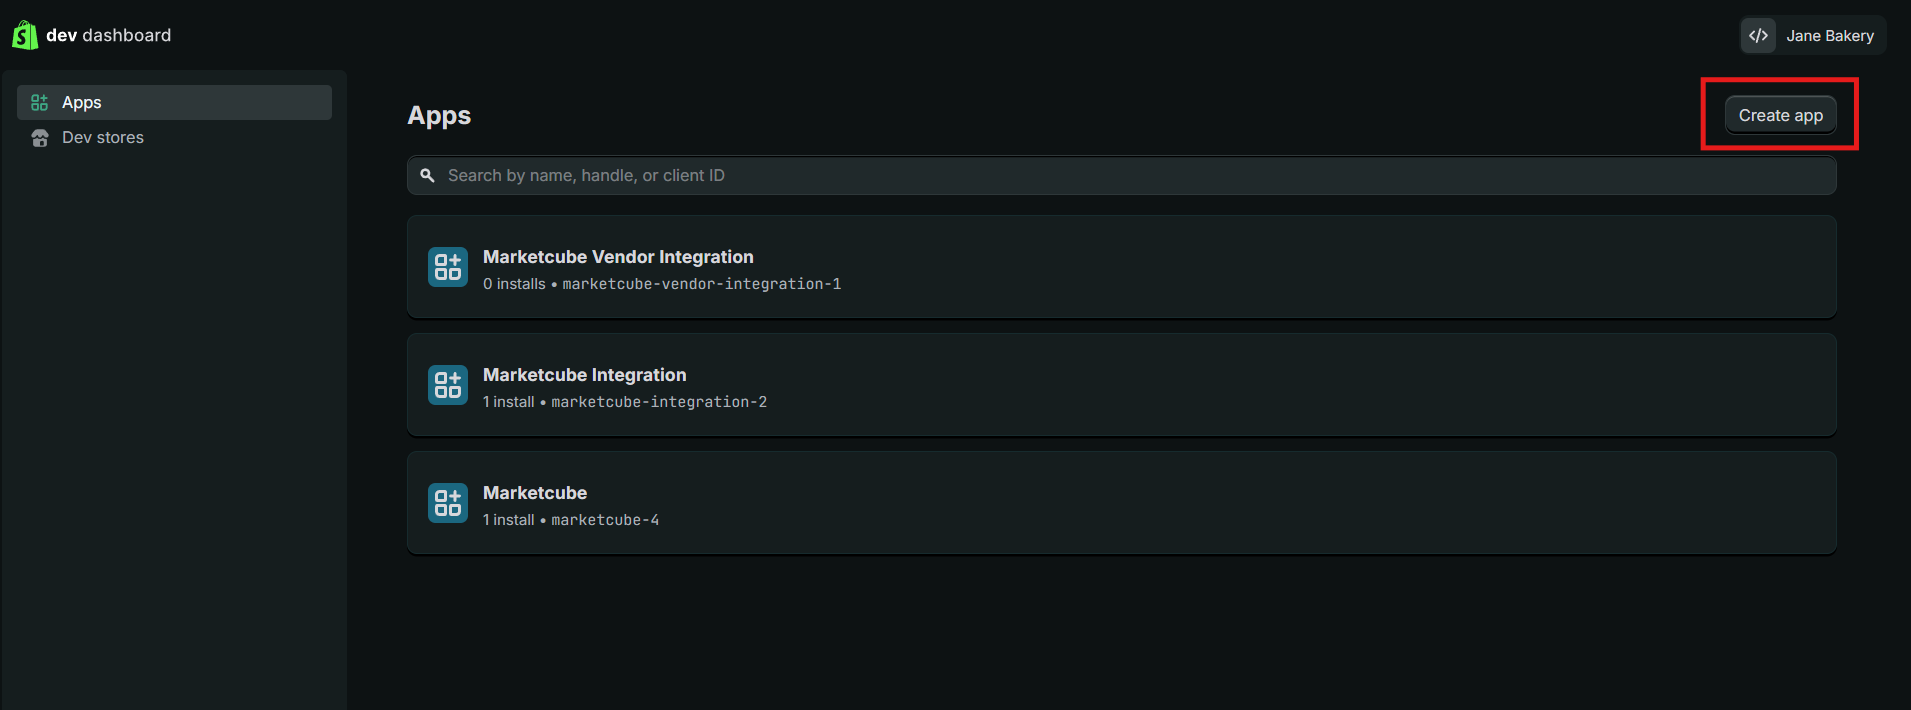
- You’ll be taken to the Apps Index – Developer Dashboard. From here, click Create app to continue.
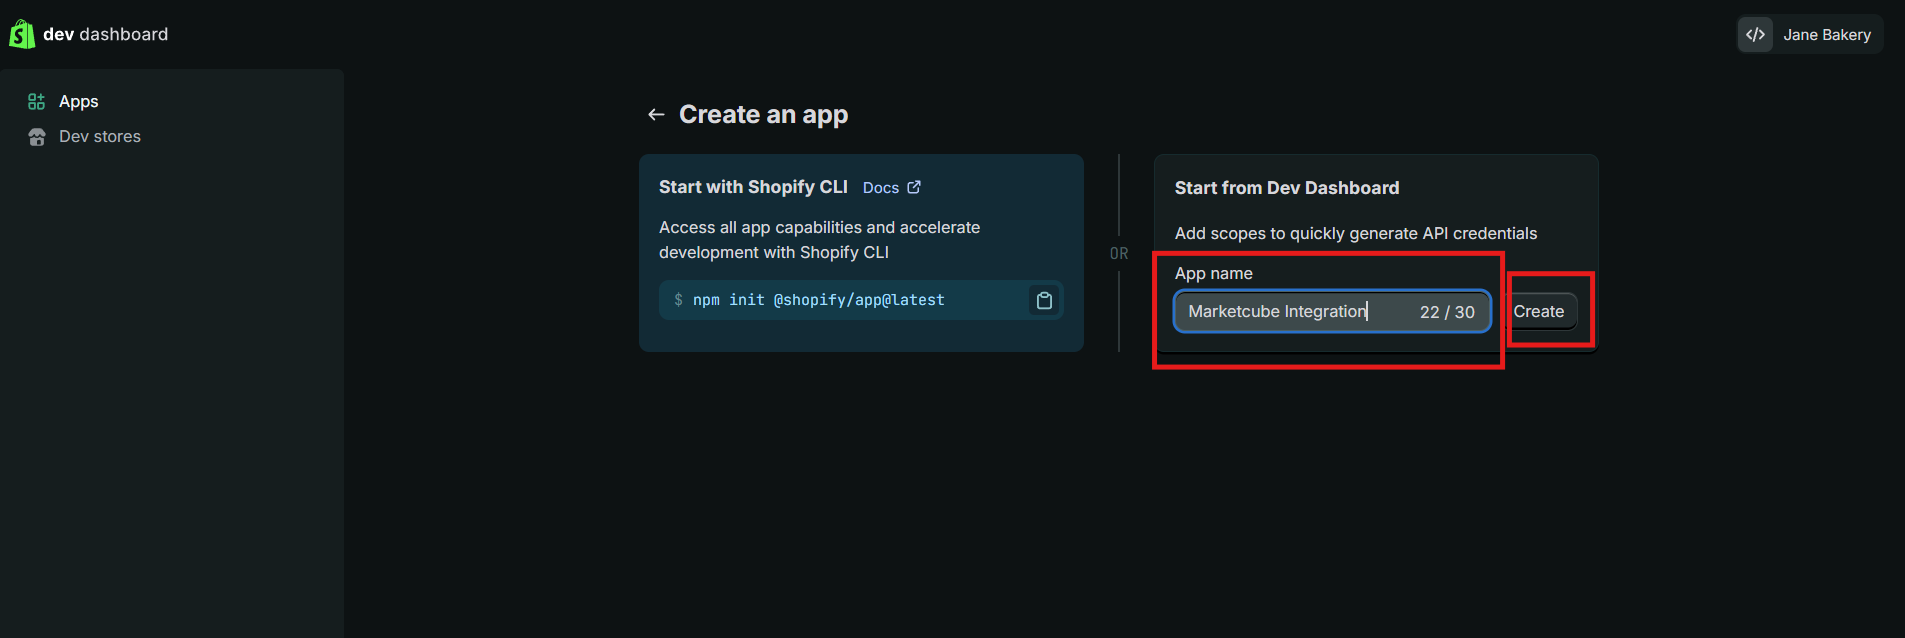
- Enter a name for your app, in the app name field (for example, “Marketplace Integration”), & then click Create.
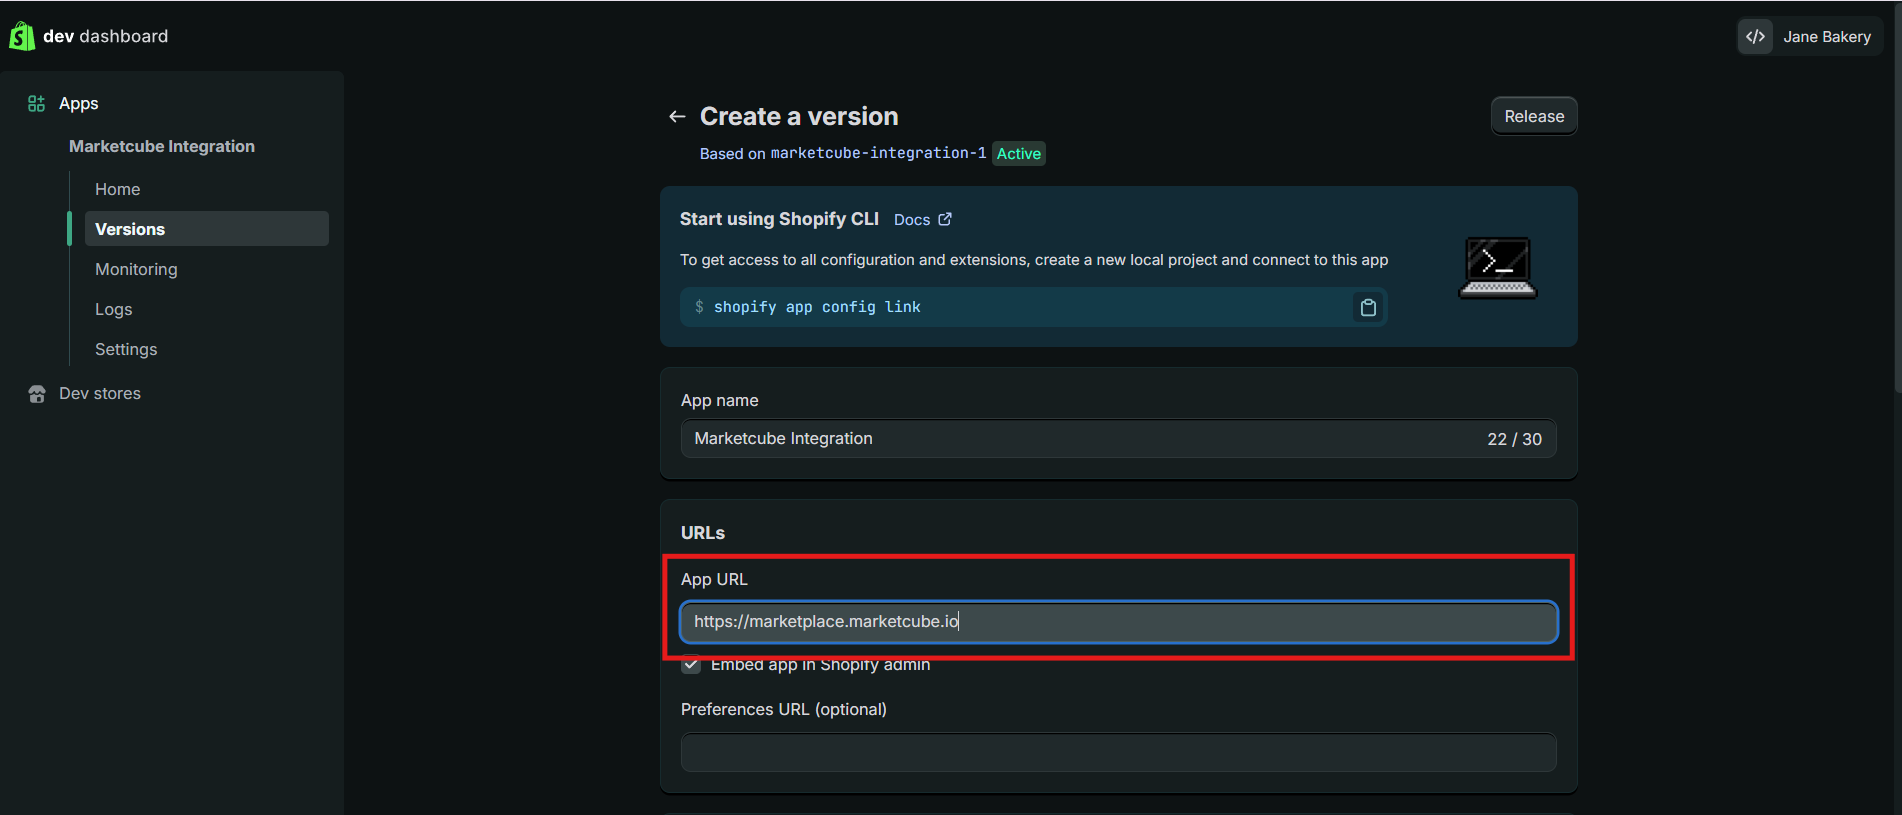
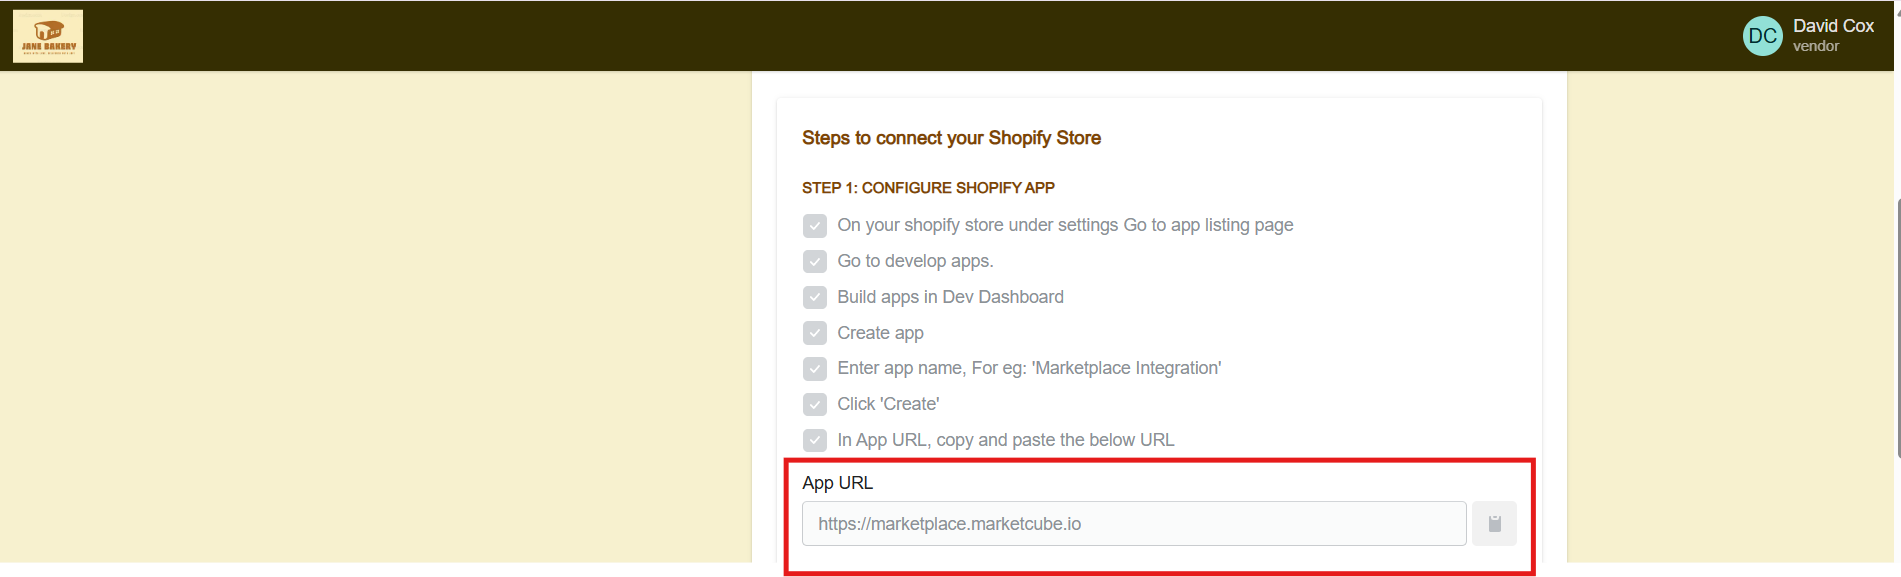
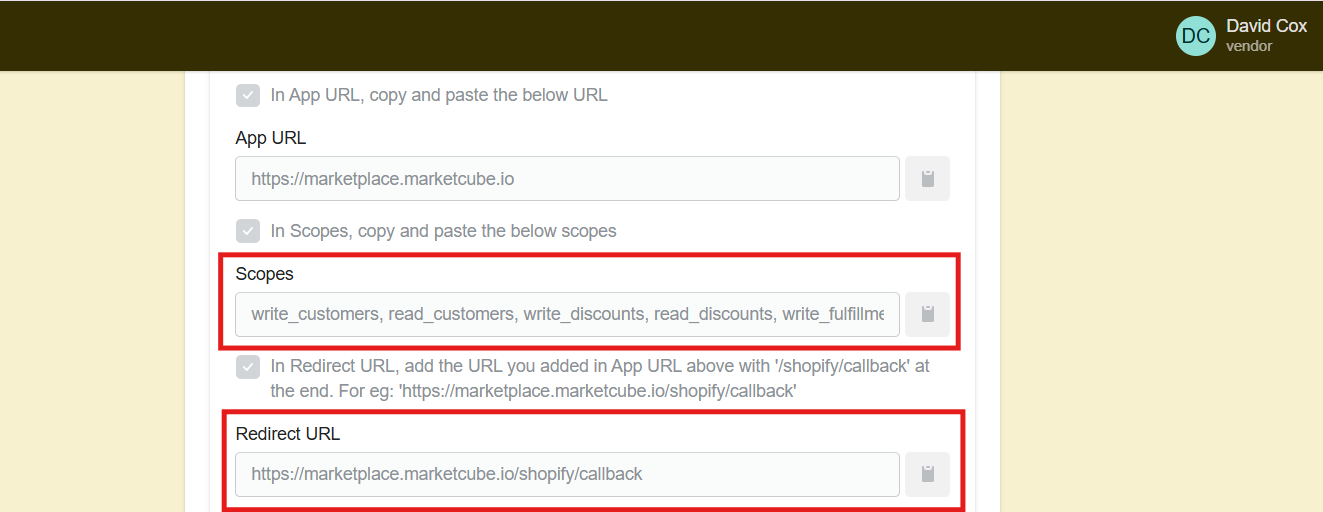
- Once you click on Create, it will take you to another window where under the App URL section, you need to copy and paste the URL shared in your Marketcube setup step 1 guide.
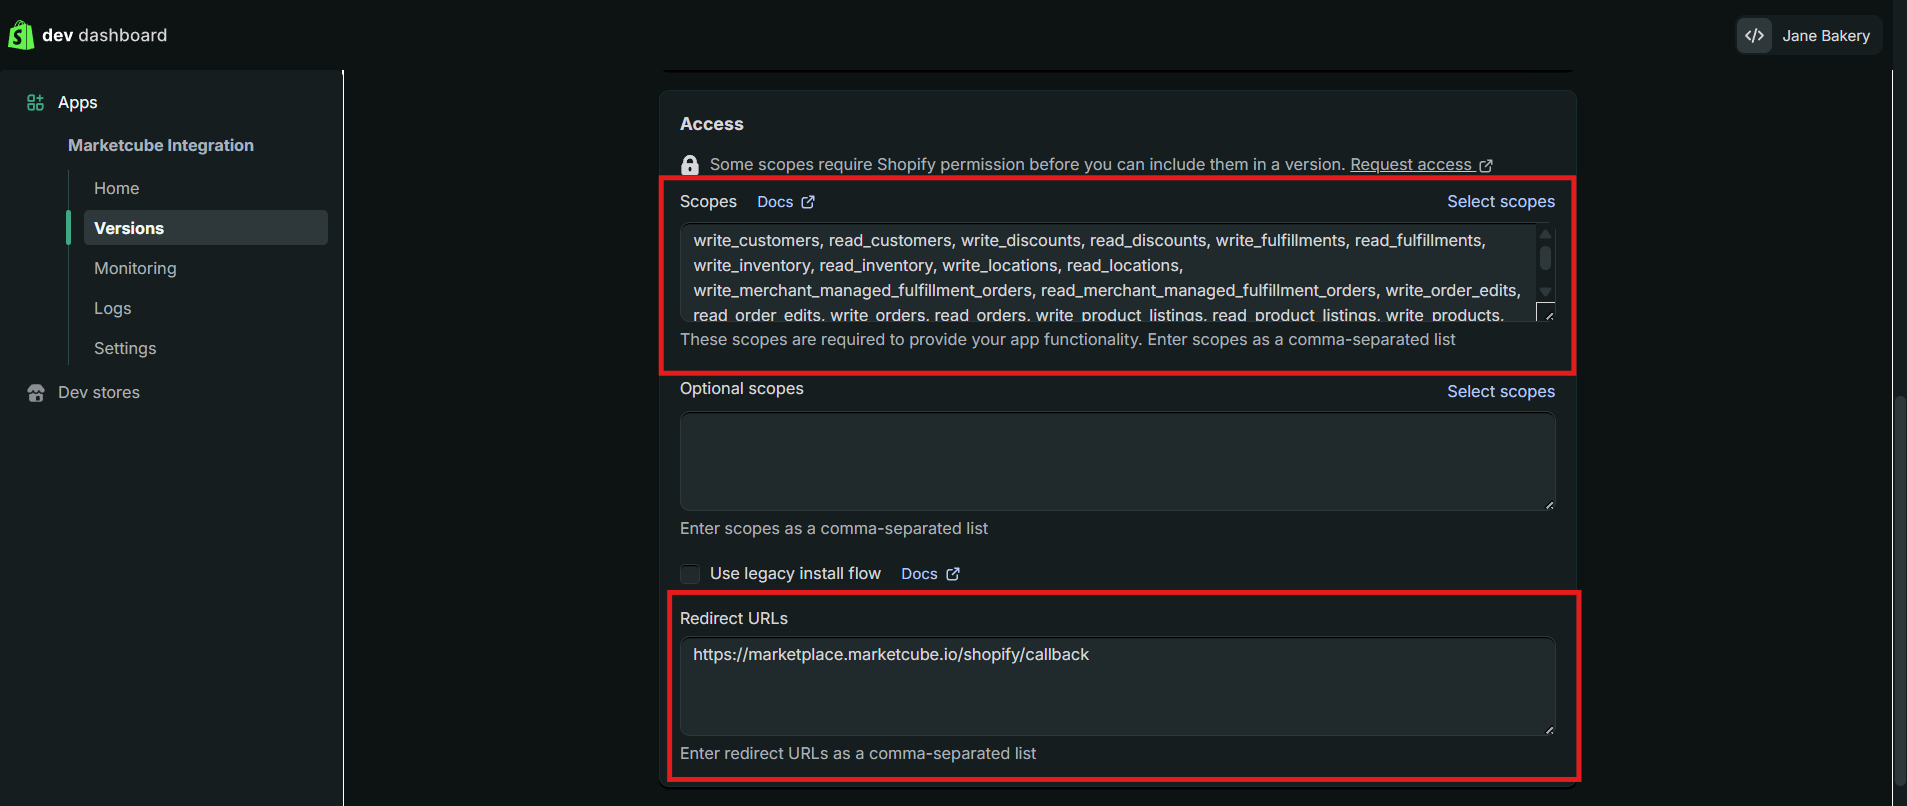
- Scroll down on the page and, under Scopes and Redirect URL as well, copy and paste the values provided in Step 1 of your Marketcube setup guide.
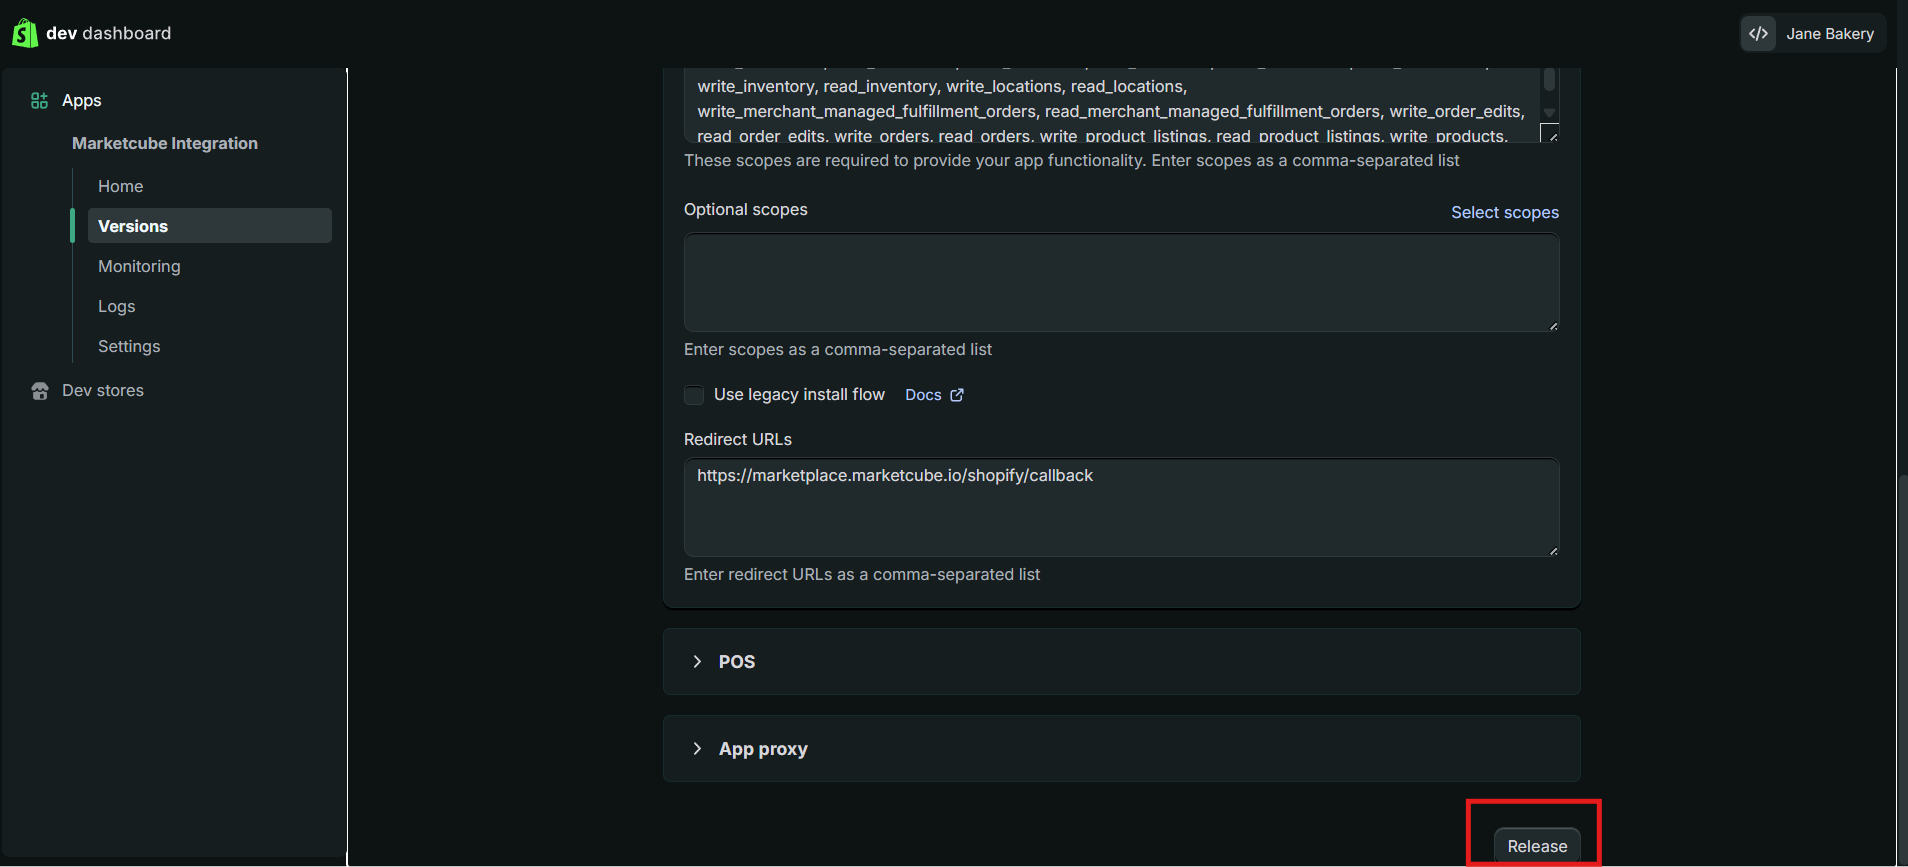
- Scroll down and click on Release button,
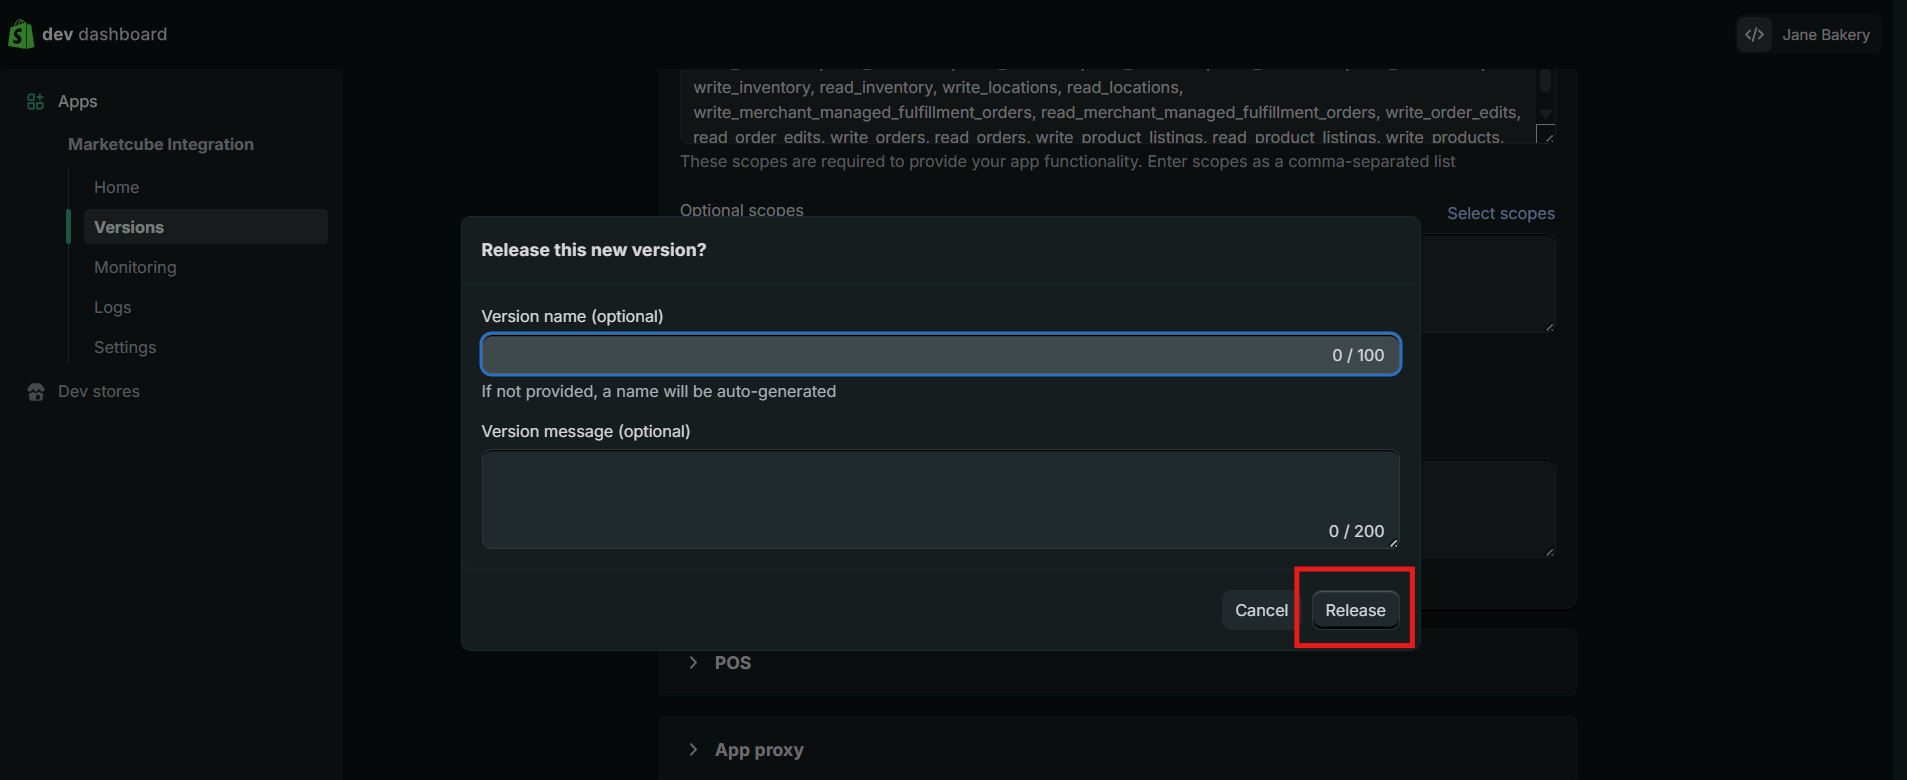
- Further a confirmation dialog will appear. Click Release again to confirm and proceed.
(B) Step 2 : Extract Credentials
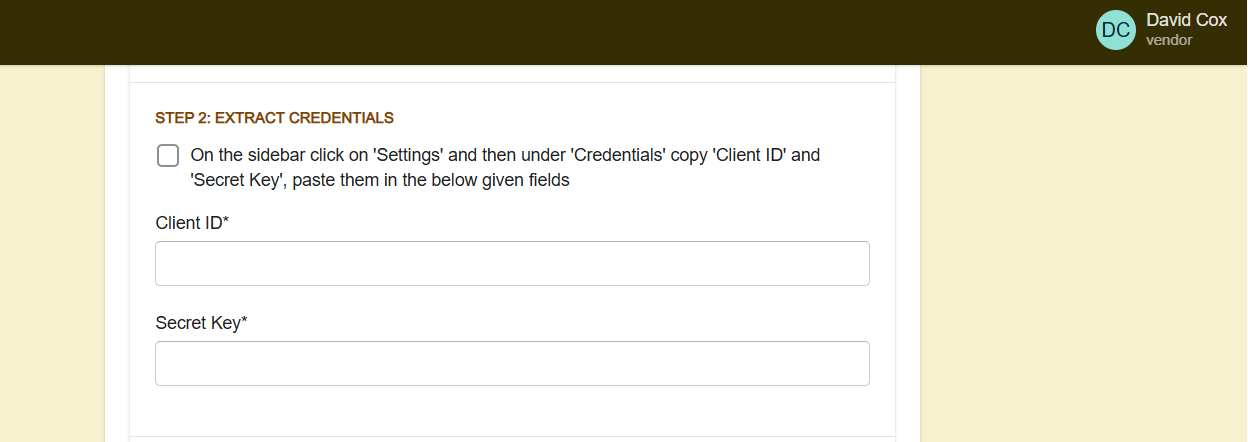
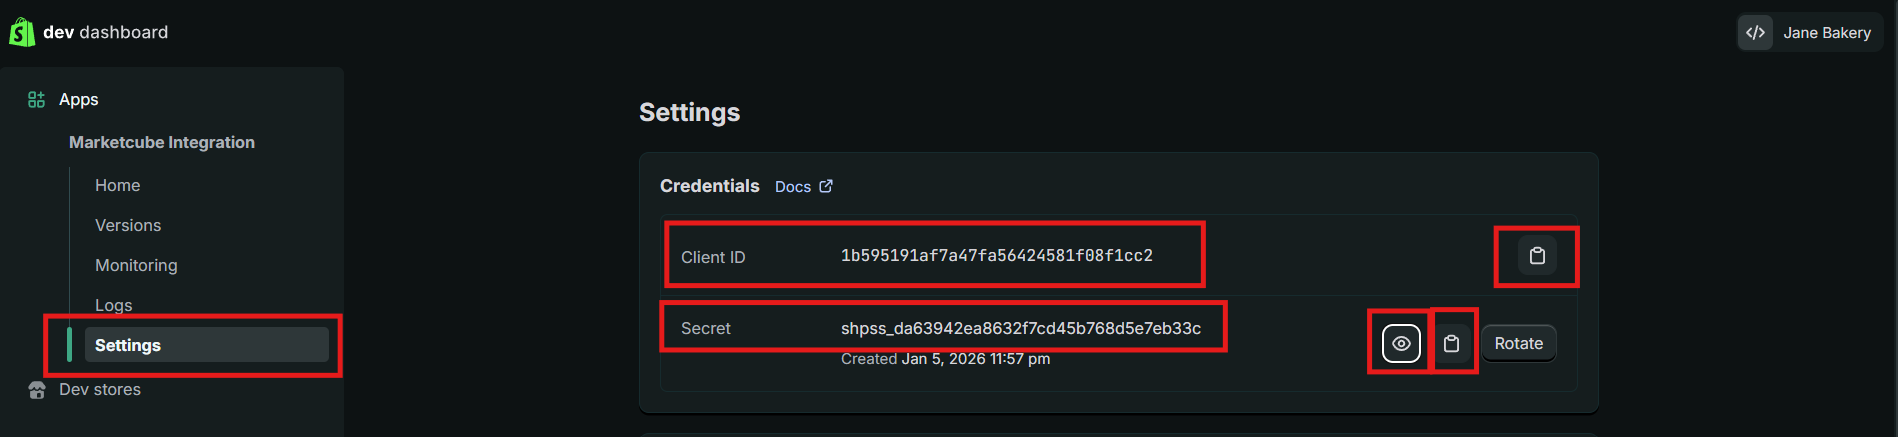
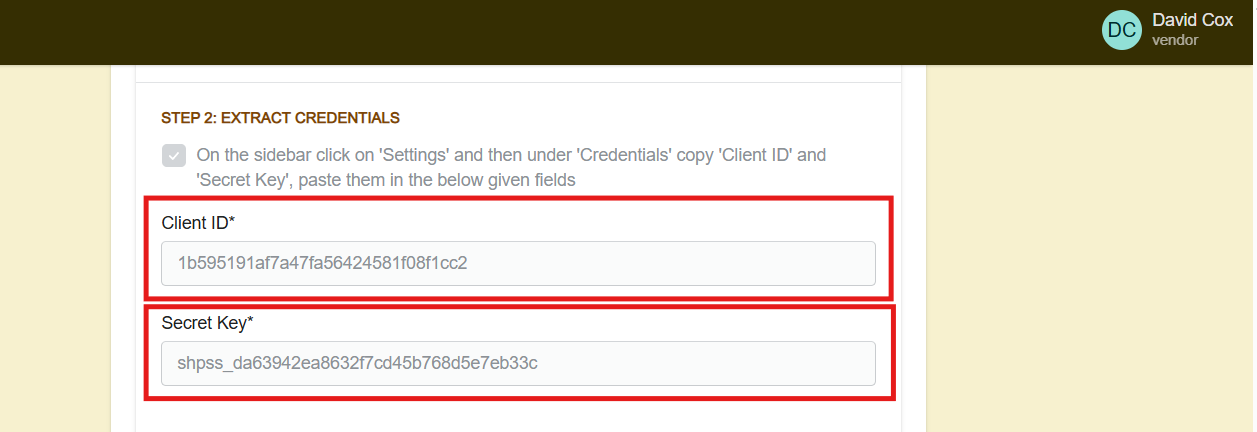
- From the Shopify Developer Dashboard, click Settings in the left sidebar & under the Credentials section, copy the Client ID and Secret Key and further paste these values into the corresponding Client ID and Secret Key fields in your Marketcube setup screen (as shown below)
(C) Step 3 : Select Distribution
-
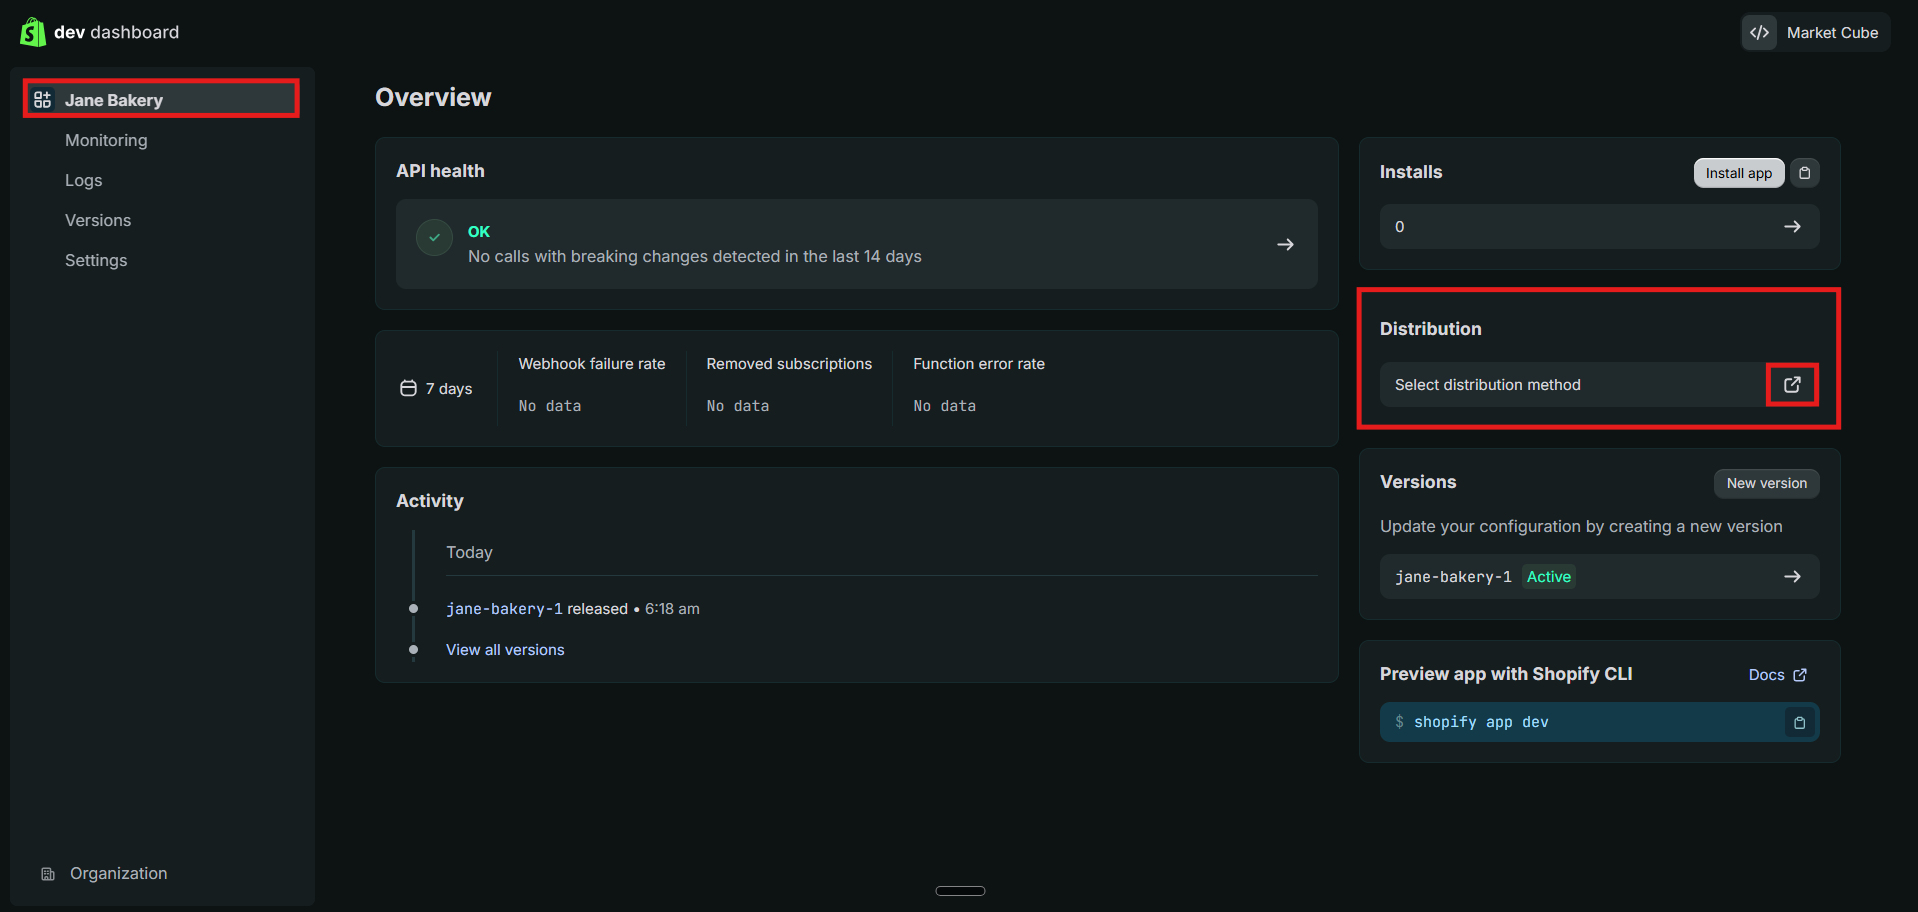
Next, from the Shopify Developer Dashboard, click on your app's name (like Jane Bakery in this case) in the left sidebar & in the Distribution section, click Select distribution method to proceed further.
Important Note:
If you do not see the Distribution option, please skip the (C) Step 3 and jump straight to (D) Step 4.
- A new window will open in your Shopify Partner account. Select Custom distribution & then click Select to continue.

- Further a confirmation dialog will appear. Click Select custom distribution again to confirm and proceed.

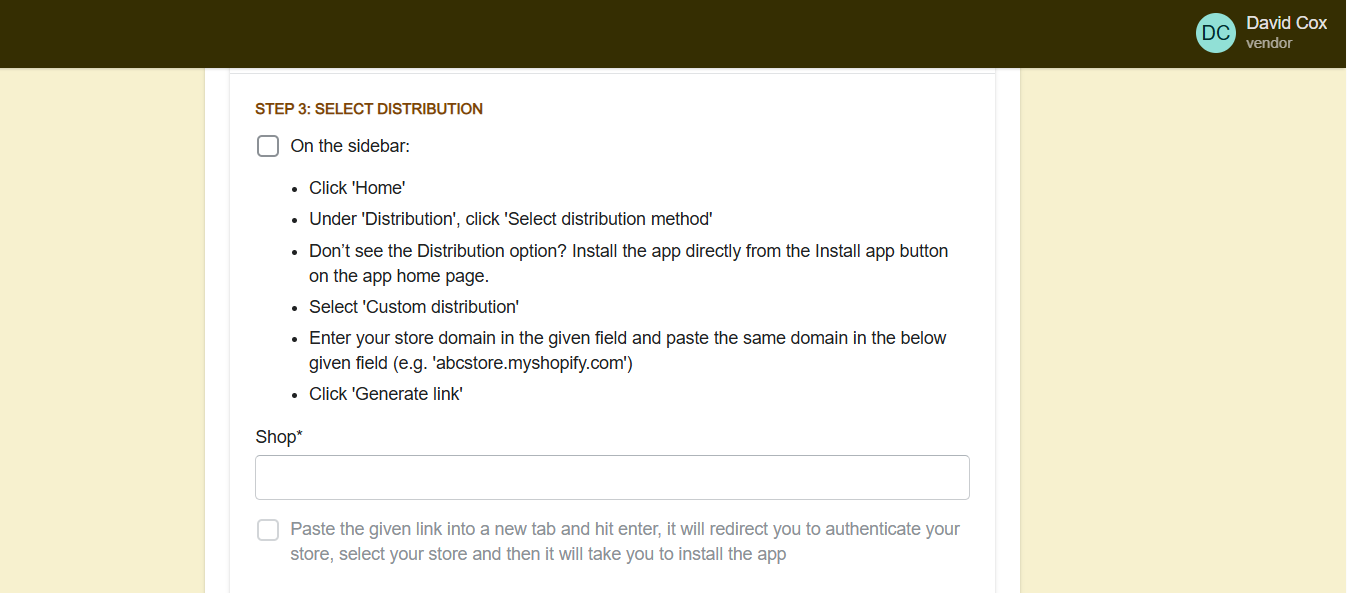
- After selecting Custom distribution, you’ll be taken to another distribution screen. Enter your Shopify store domain (for example, yourstore.myshopify.com) in the Store domain field & copy the same store domain and paste it into the Shop field shown in Step 3 of the Marketcube setup.
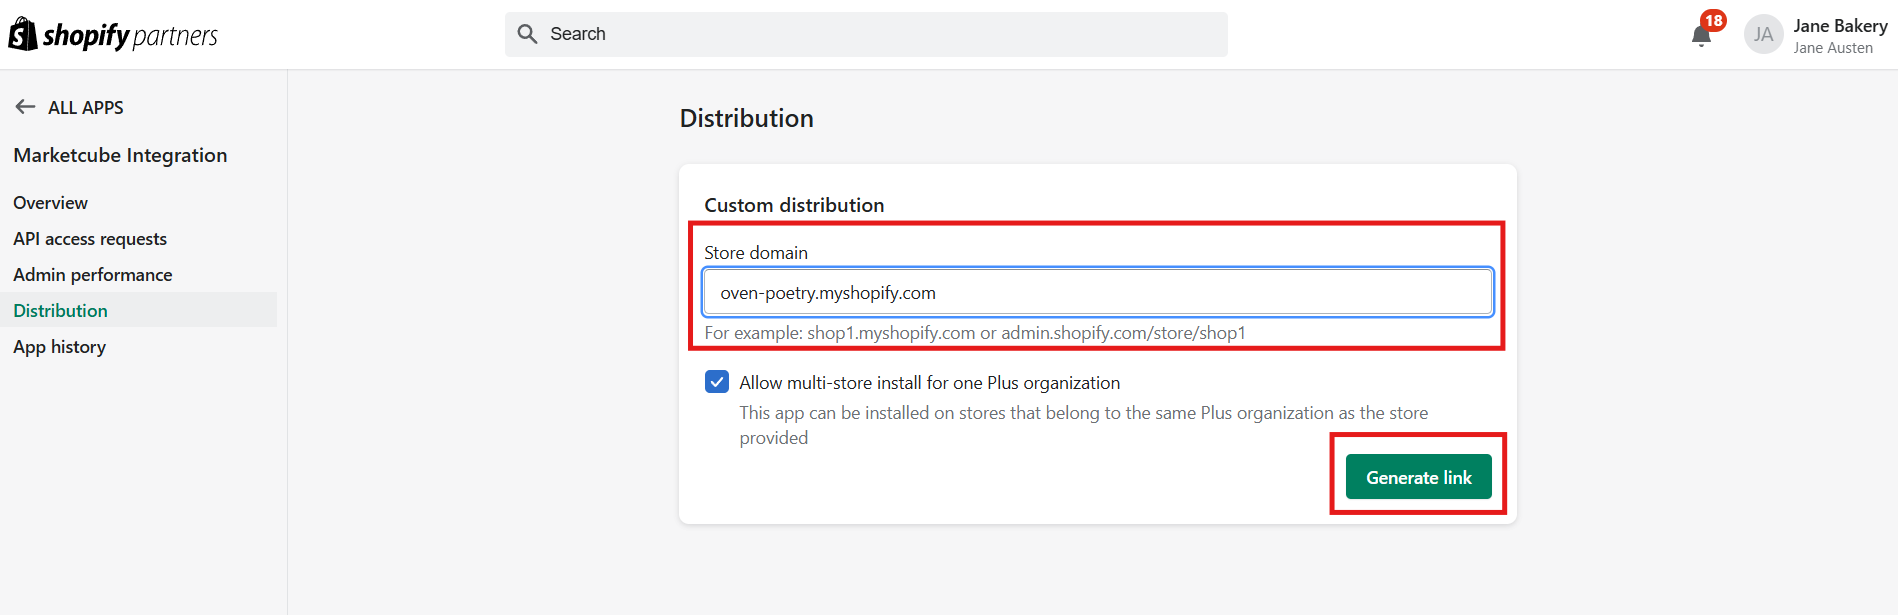
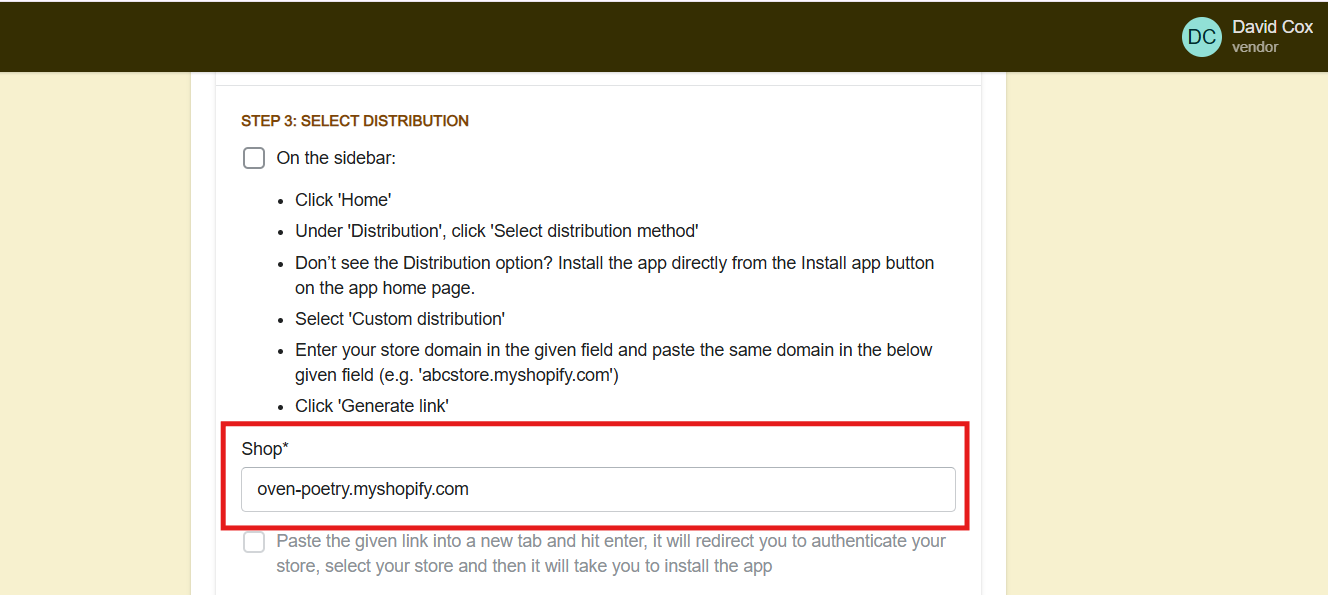
- Once both fields are filled, go back to your shopify distribution window and click Generate link .
-
Further a confirmation dialog will appear. Click Generate Link again to confirm and proceed.
- Copy the generated link shown on the Distribution screen & paste this link into a new browser tab and press Enter. You’ll be redirected to Shopify to authenticate your store.
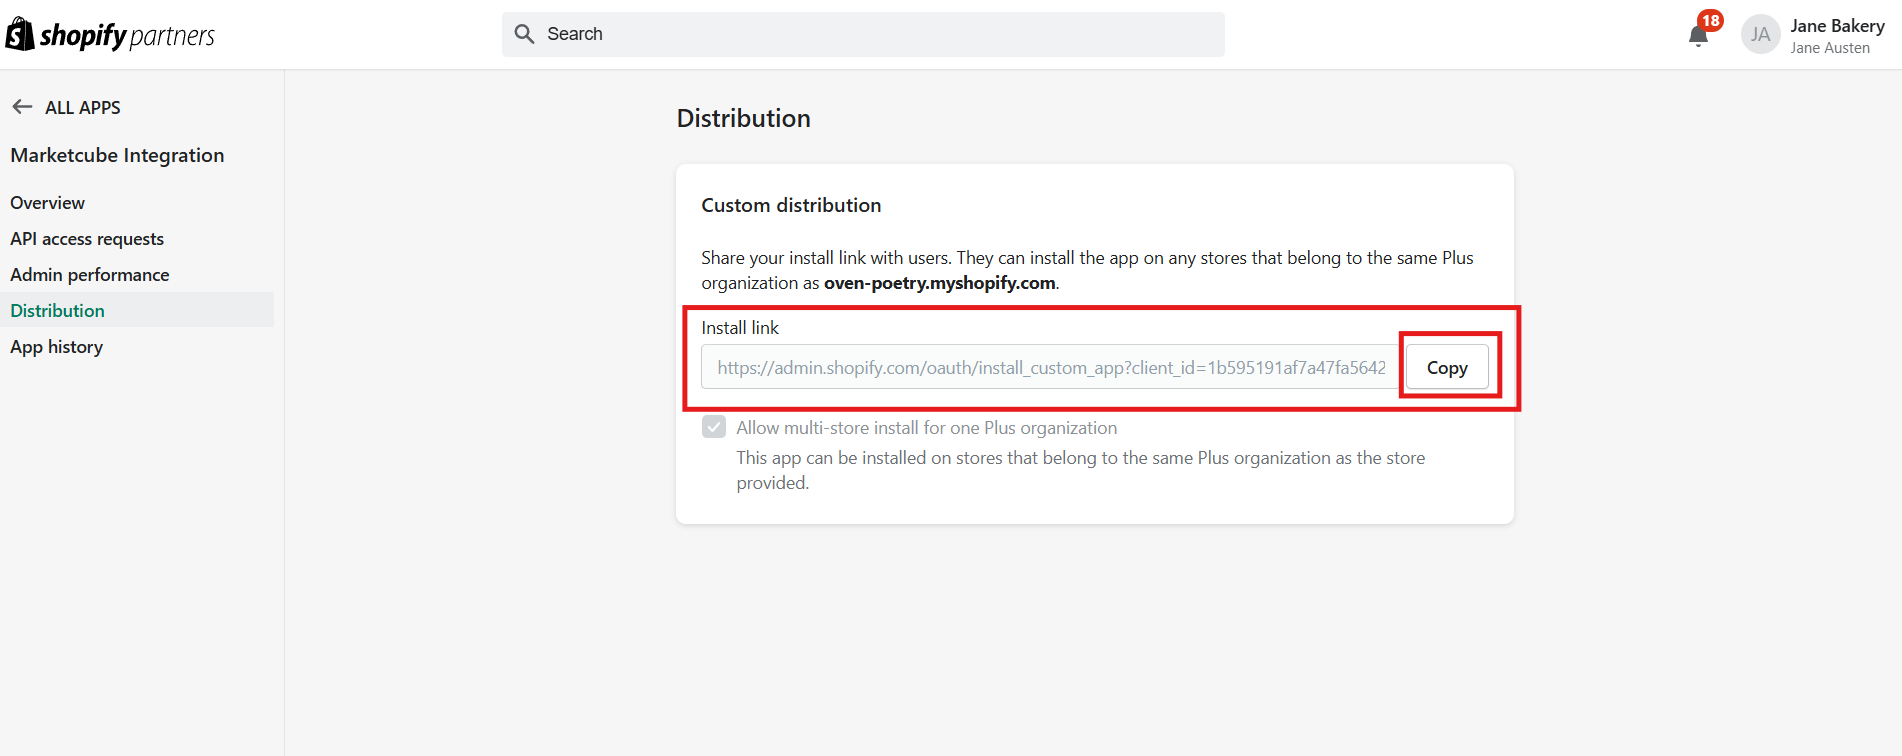
- Select your store to continue the process.
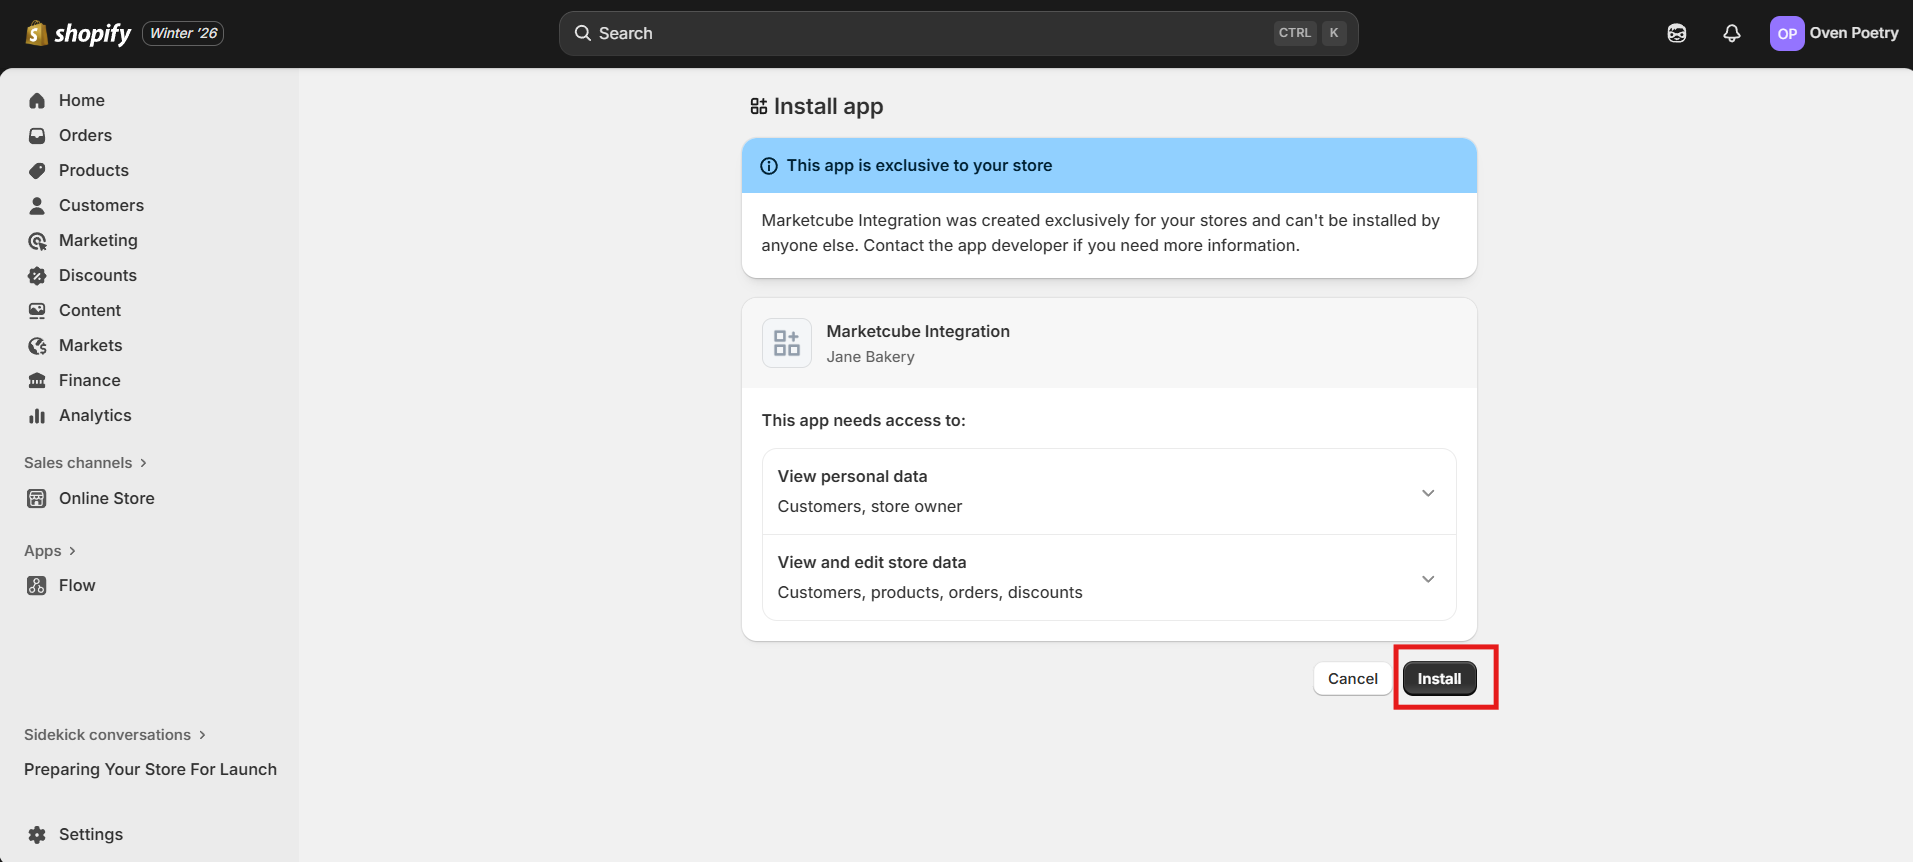
- Once you select your store for authentication , it will lend you to an Install app window (as shown below) where you need to select the Install option.
(D) Step 4 : Install App
-
If you do not see the Distribution option, you can install the app directly by clicking Install app on the app’s page.
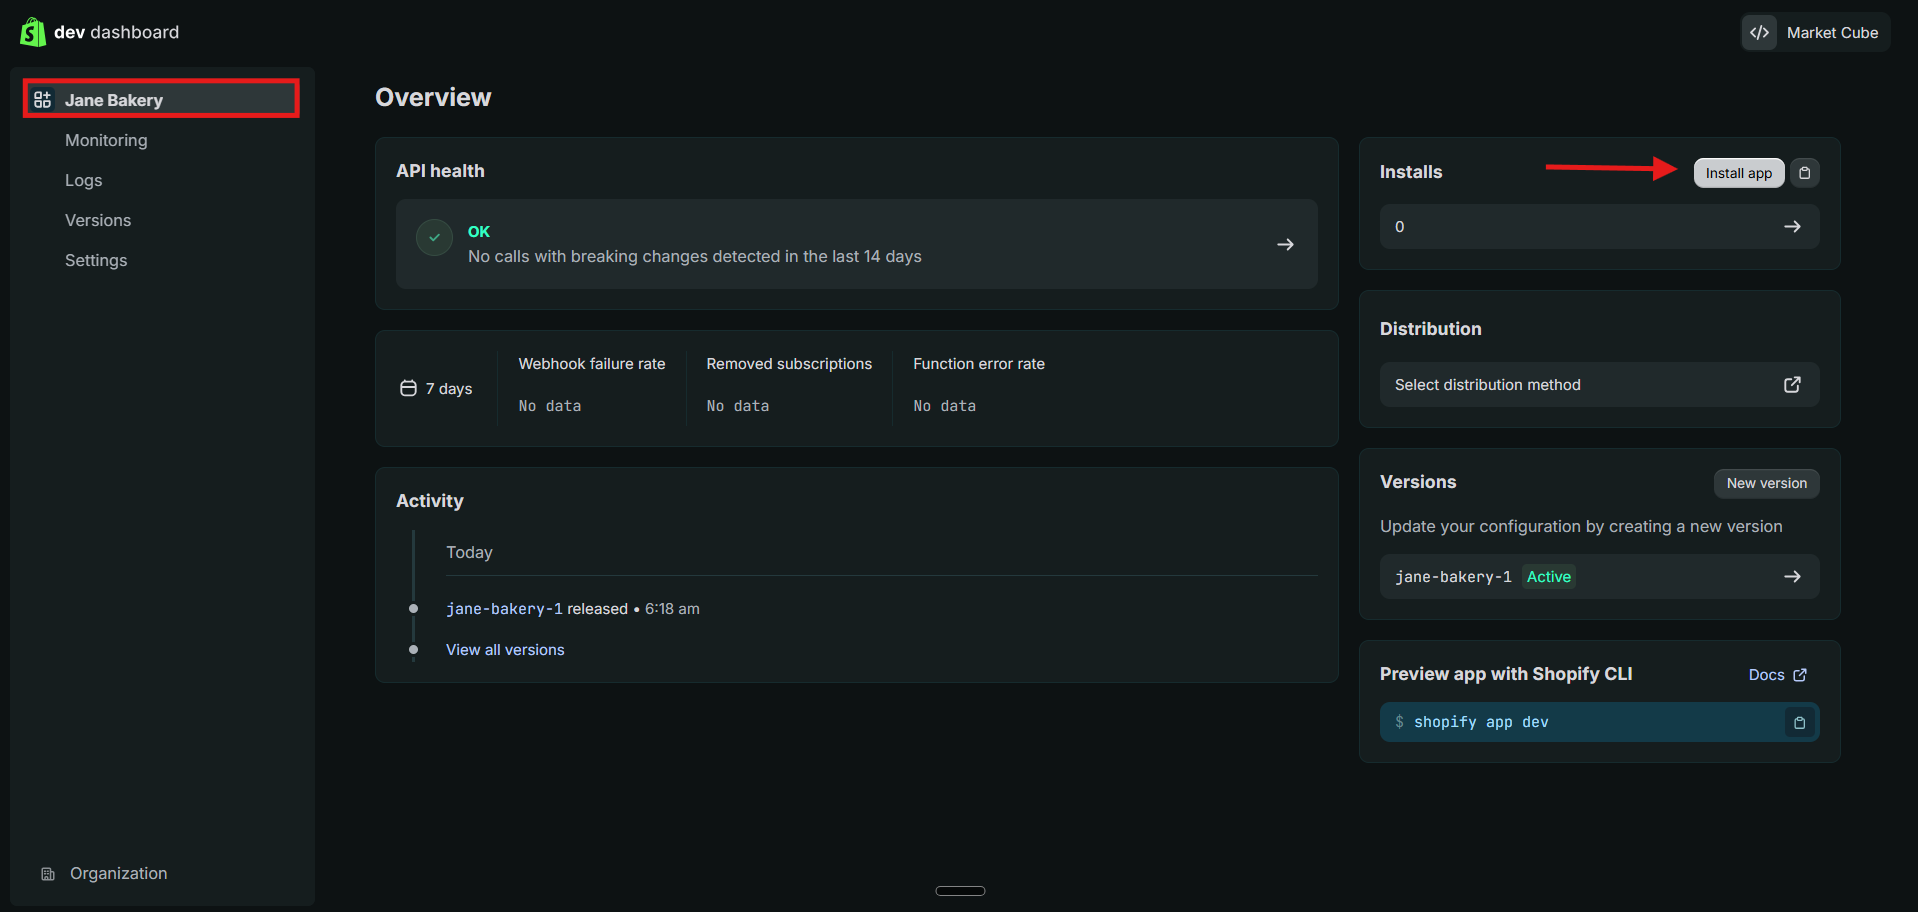
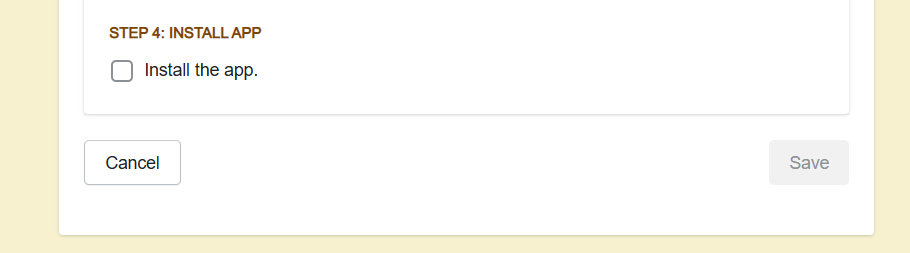
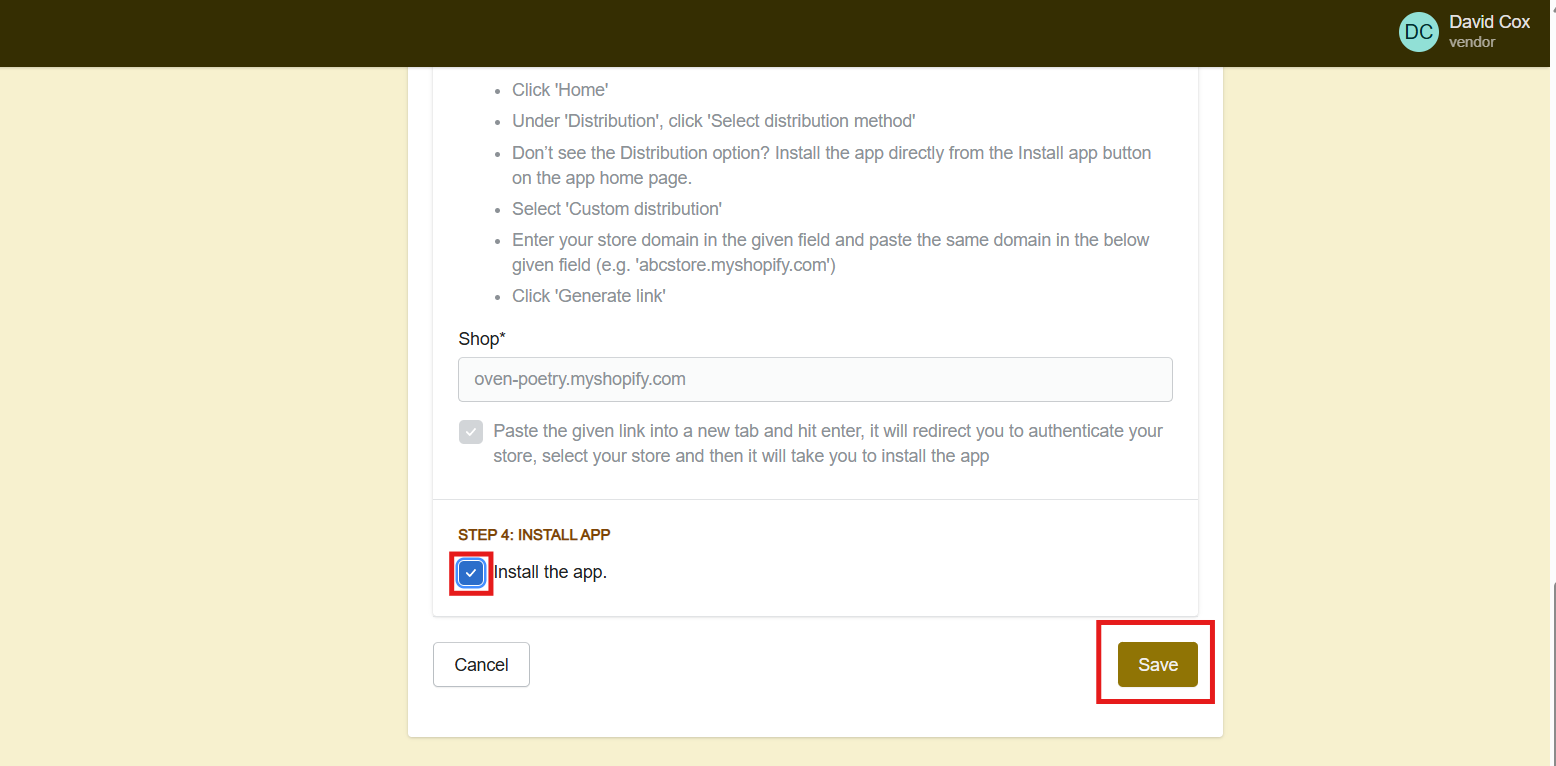
- Once done , go back to your Marketcube window and tick the install app checkbox and select Save.
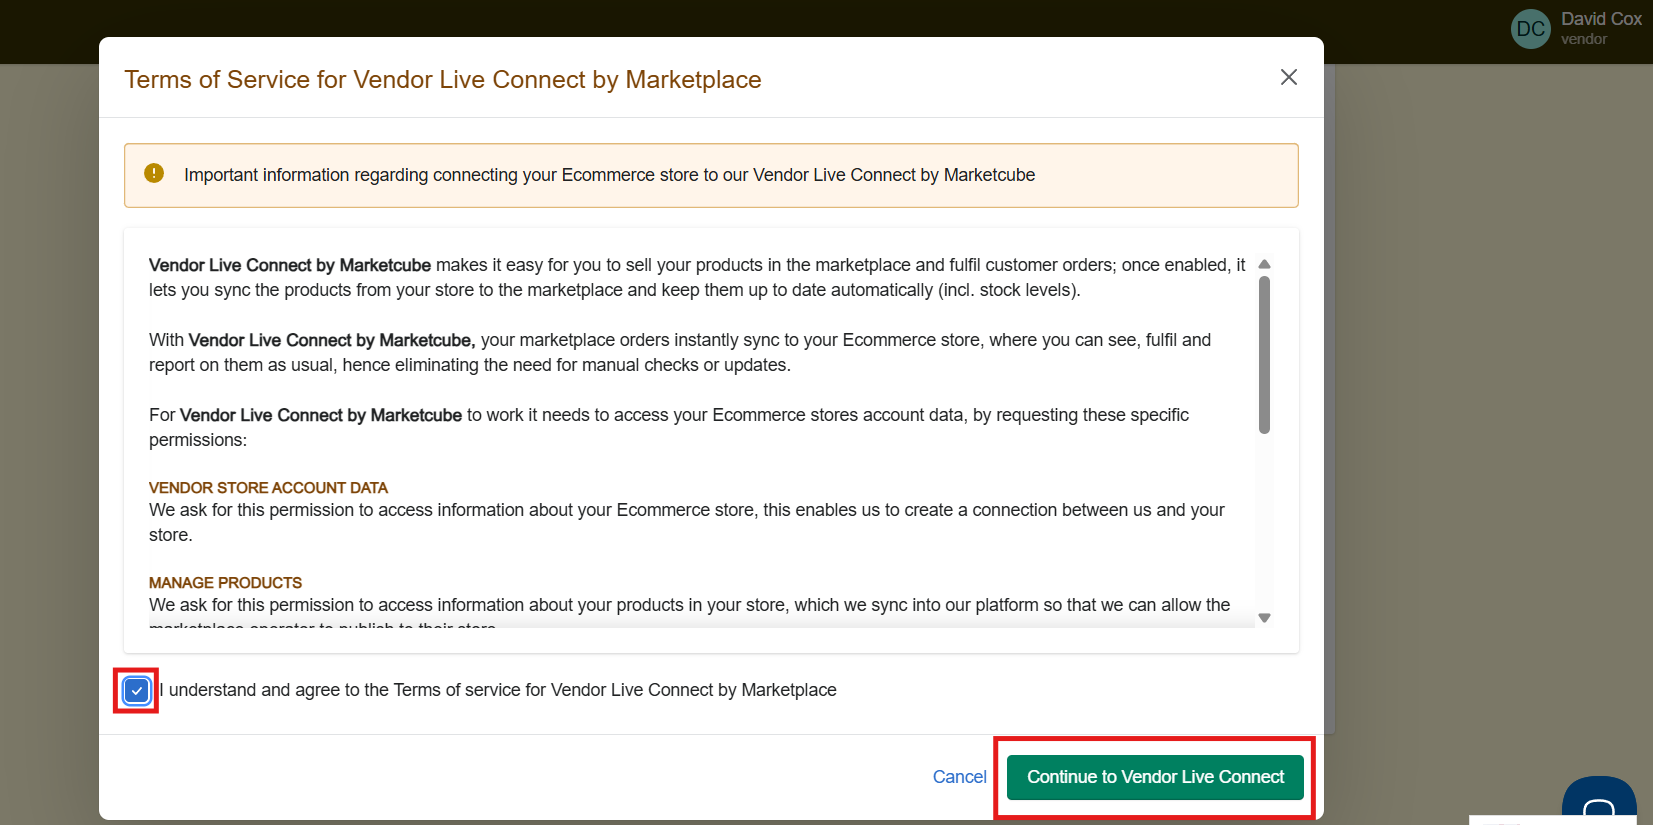
- A pop-up window will appear displaying the Terms of Service for Vendor Live Connect. Please review the terms, check the acknowledgment box, and click Continue to Vendor Live Connect to proceed.
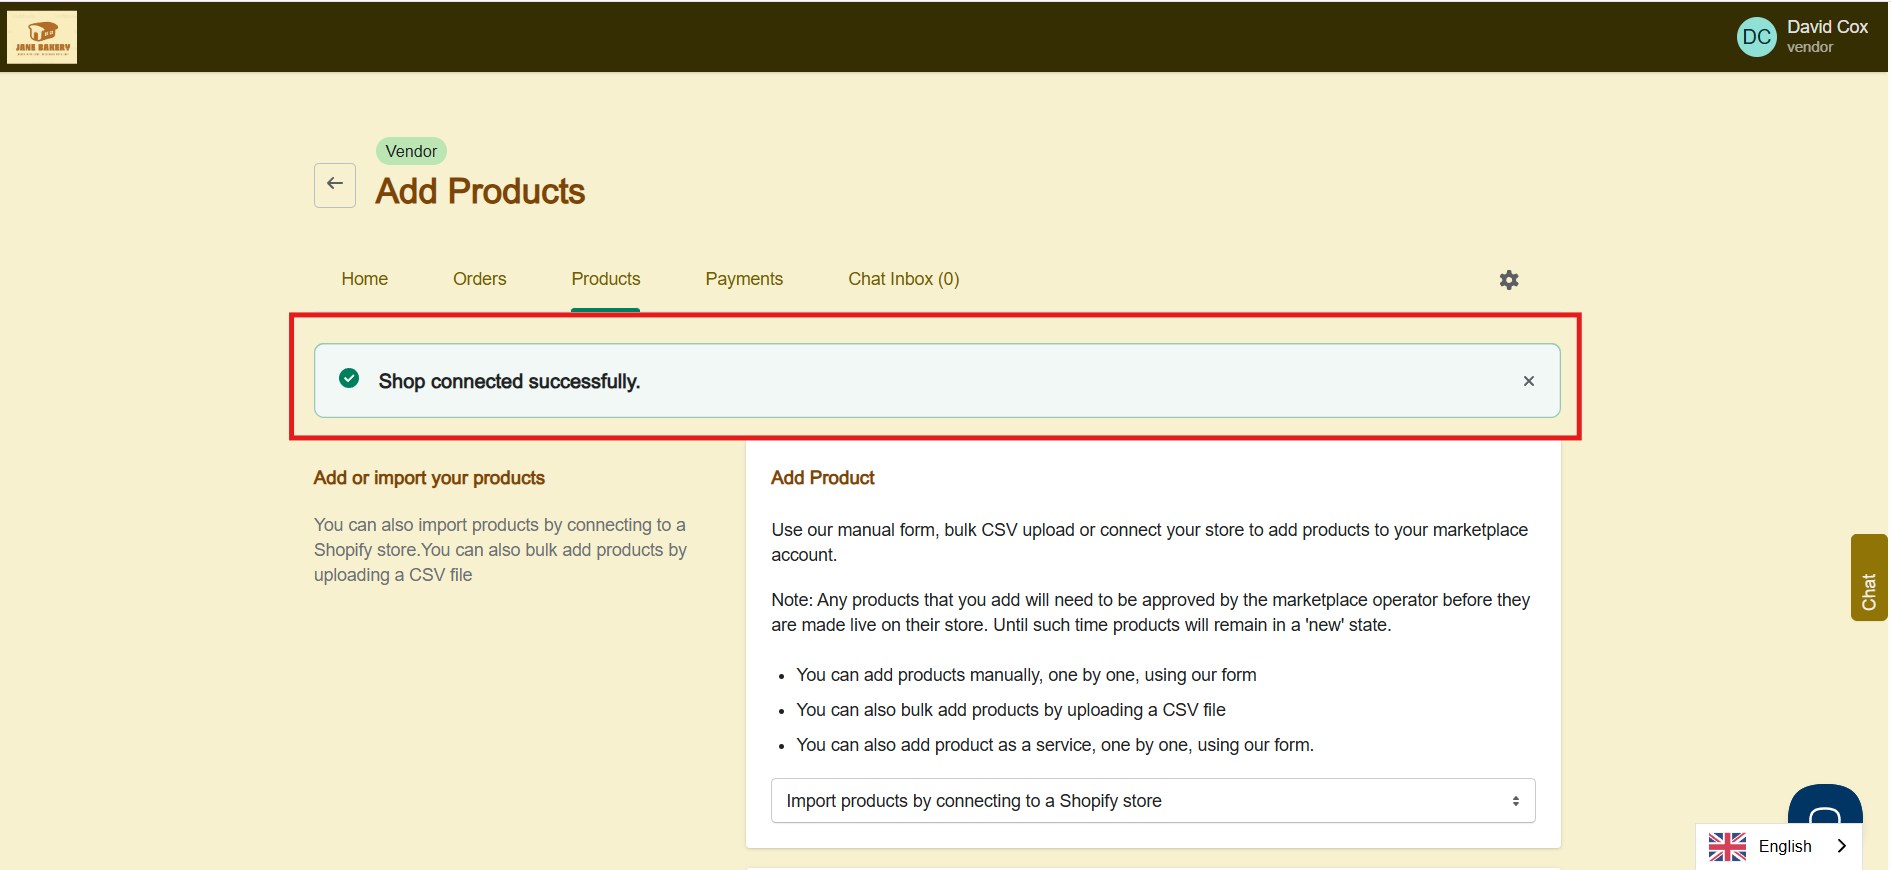
- Once the connection is successfully established, you will see a confirmation message: “Shop connected successfully.” This confirms that your Vendor Shopify store is now live-connected with your Vendor Marketcube account.
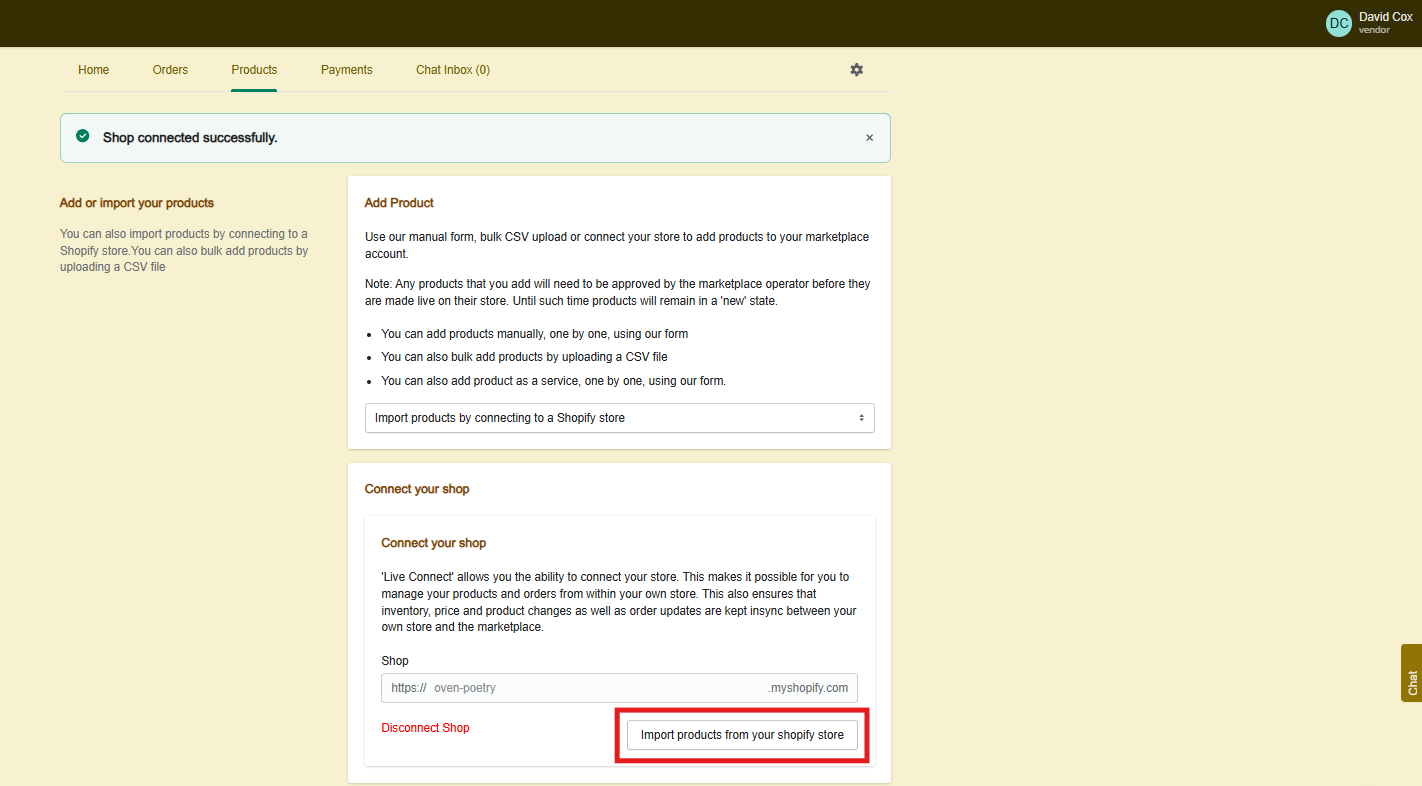
- After the live connect is complete, vendors can start importing and syncing their products directly from their Shopify store by selecting the option “Import products from your Shopify store.”
-
Note:- For additional guidance, you can refer to this 👉 video 👈 which walks through the entire process both on Marketcube and within Shopify.
You can refer to this article for details on how you can import products from your live-connected store to Marketcube account once your Vendor live-connect is established successfully.