How to customise the vendor view?
In this article, you will learn, how you can customize your vendor's portal. You can add in a custom domain, logo as well as colour scheme to make sure your vendors only view your marketplace branding.
As a Marketplace operator, you have the ability to customize your vendor's view with your marketplace branding. Have a look below to see the options available to you as a marketplace operator.
How to customize vendor view:
1. Log into your Marketcube operator account.
2. Click the Settings icon >> Navigate to Branding >> Click Show.

3. See the various options available for an operator to customize the vendor's view.
- You can add a Custom Domain - once configured your vendors will use your customized domain link to onboard and log into their Marketcube account. See how you can set up your custom domain.

2. Brand Description - this is what your vendors will view when they will onboard and log into their Marketcube account.

3. Add your Brand Logo ( Standard image file size: 1MB. Logo size width: 200px, height: 110px. Allowed image formats: GIF, JPEG, PNG, and SVG.)

4. Update your Favicon: You can add your favicon as your branding, this icon will be seen in headers to your associated vendors. ( Standard image file size: 1MB. Logo size width: 96px, height: 96px. Allowed image formats: GIF, JPEG, PNG and SVG)
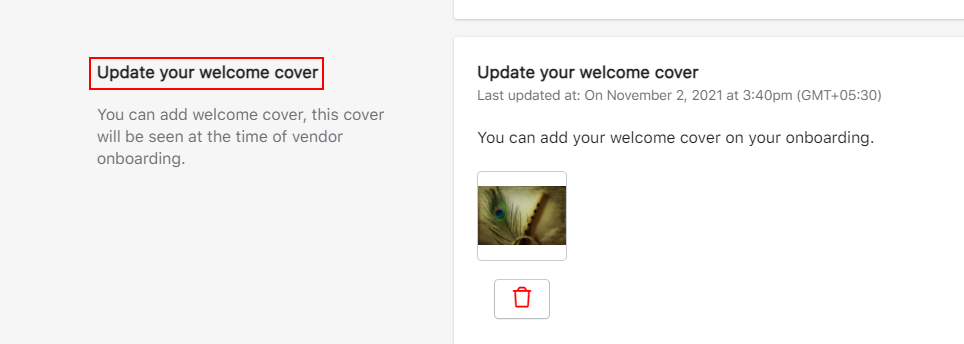
 5. Update your welcome cover: You can add a welcome cover, this cover will be seen at the time of vendor onboarding. ( Maximum image file size: 10MB. Finish setup cover size width: 380px, height: 400px. Allowed image formats: JPEG and PNG)
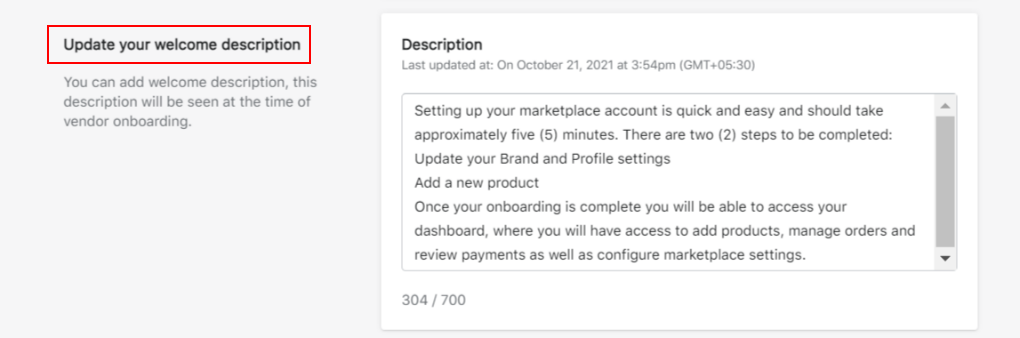
6. Update your welcome description: You can add a welcome description for your vendors. This description will be visible at the time of vendor onboarding.
7.Update your finish setup cover: You can add a finish setup cover, this cover will be seen at the time of vendor onboarding. ( Maximum image file size: 10MB. Finish setup cover size width: 380px, height: 400px. Allowed image formats: JPEG and PNG)
 8. Update your finish setup description: You can add a finish setup description, this description will be visible at the time of vendor onboarding.

9. Customize your header background colour: Choose the colour of the header, this header will be shown to your associated vendors and vendors registering through your invite link.

10. Customize your header colour: Choose the colour of the text in the header, this text colour will be shown to your associated vendors and vendors registering through your invite link.

11. Customize your button background colour: Choose the colour of the button, this button colour will be the same to your associated vendors and vendors registering through your invite link.

12. Customize your button colour: Choose the colour of the text in the button, this text colour will be the same to your associated vendors and vendors registering through your invite link.

13. Customize Login Page Header: This customized login page header will be shown to all of your associated vendors.

14. Customize Register Page Content: This customized register page content will be shown to all of your associated vendors.

15. Customize email signature: Updated email signature will be visible to all emails sent by your store.
 16. Update footer text: Updated footer content will be visible to all logged-in pages of you and your associated vendors.

17. Hide Details: You can hide Marketcube details (Help centre and Intercom chat) from your associated vendors.

4. Lastly, Click on Save to submit your details.
Got more questions? Use the chat on your right or email at support@marketcube.io to get in touch.