How to Use Multiple-Select Metafields Feature?
Metafields allow you to store additional information about your products—like certifications, materials, or specific technical specs—that aren't captured in standard product fields.
With the Multi-Select Feature, you can create a predefined list of options (e.g., a list of colors or materials), and your vendors can select one or multiple of these options for a single product.
Prerequisites
Before you begin, please ensure the following:
- Operator Access: You must be logged in as an Operator to configure these settings. Vendors cannot create new Metafield definitions; they can only select from the list you provide.
- Defined Options: Have your list of options ready (e.g., a list of all possible "Materials" like Cotton, Polyester, Wool). You will need to type these in as a comma-separated list.
- Theme Compatibility: Ensure your Shopify theme is set up to display these Metafields if you intend to show them to customers on the live product page.
Part 1: How to Configure Multi-Select Metafields (Operator Side)
This setup is done by the Operator to define what options will be available to the vendors.
1. Navigate to Metafield Settings:
- Log in to your Operator Account.
- Click the Settings Icon and in Products settings, click the Manage Metafields option.

2. Add or Edit a Metafield:
- Click on +Add Metafield.
- Display Name: Give your field a clear label (e.g.,
ColororMaterials). - Content Type: Select Text.
3. Set Up the Dropdown Values:
-
Value Type: Change this dropdown from "Maximum Length Text" to Dropdown.
Value: In this box, type all the options you want to be available, separated by commas.
- Example:
Black, White, Blue -
Example:
Cotton, Polyester, Wool, Recycled Plastic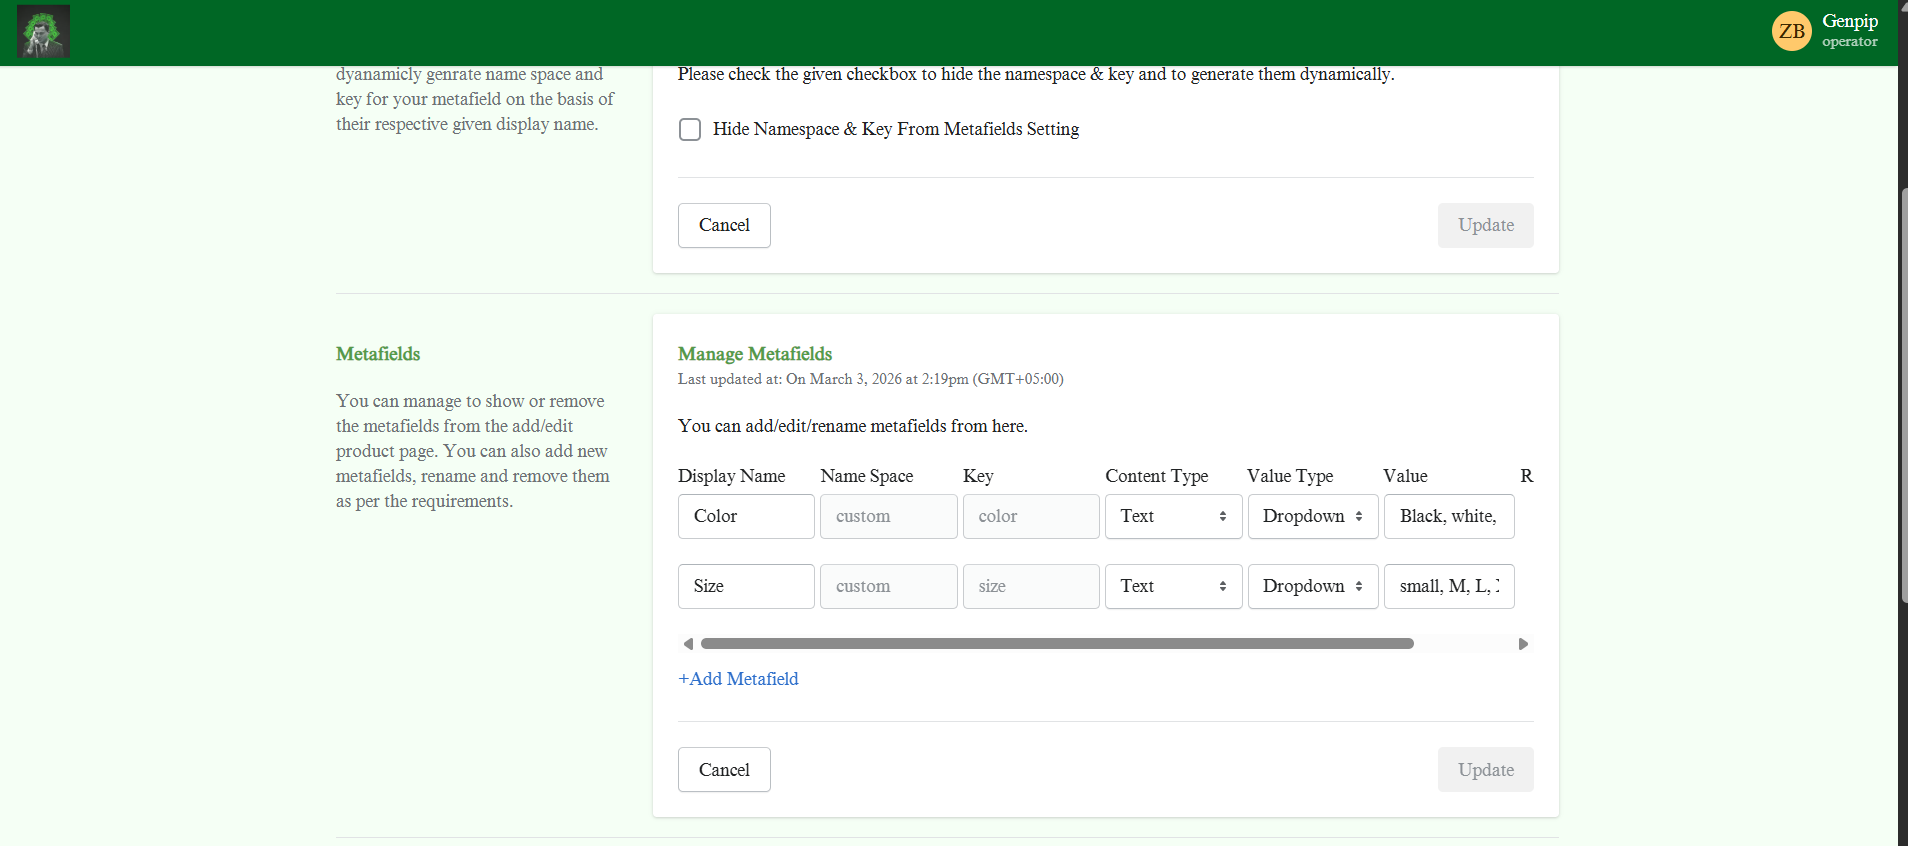
- Example:

4. Save:
- Click Update or Save to finalize the list.
Part 2: How to Select Multiple Values (Vendor/Operator Side)
Once configured, these options appear on the product page. Here is how you (or your vendors) can assign them to a product.
1. Open the Product:
- Navigate to Products and click Add Product (or Edit Product).
- Click on the Metafields tab on the right side of the menu bar.
2. Select Your Options:
-
Locate the specific Metafield you created (e.g.,
Color).Click on the field to reveal the dropdown list of options you configured earlier.
Select Multiple Items:
- Click the first option you need (e.g.,
Blue). - Click the field again to select a second option (e.g.,
Black). -
Selected items will be highlighted (usually in grey) to indicate they are active.
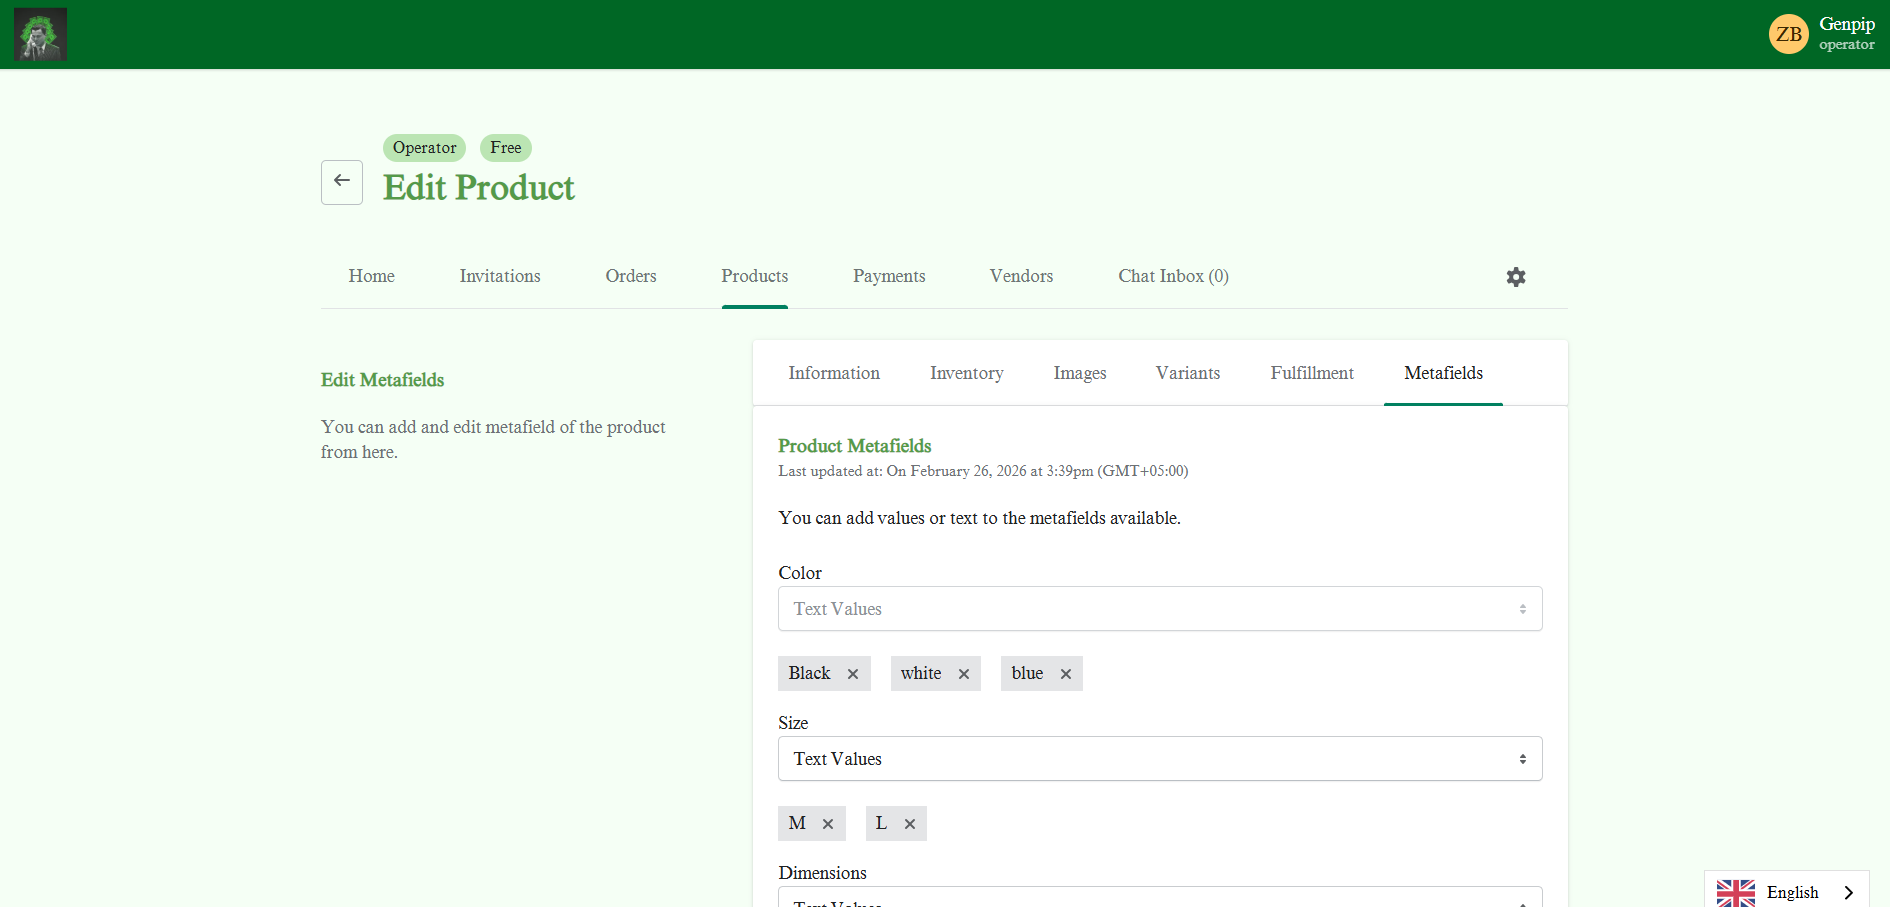
- Click the first option you need (e.g.,

3. Save Changes:
- Once all relevant tags are selected, click Finish or Save.
- The product will now be associated with all the selected values (e.g., it will be tagged as both
BlueANDBlack).
Important Note: How to structure Marketcube Metafields in Shopify
When Marketcube syncs metafields to Shopify, they may initially appear as "Unstructured" data. To use these fields in your Storefront filters or display them on your theme, you must convert them into Structured Definitions.
1. Locate Unstructured Fields:
-
In your Shopify Admin, go to Settings and select Metafield and Metaobjects settings.
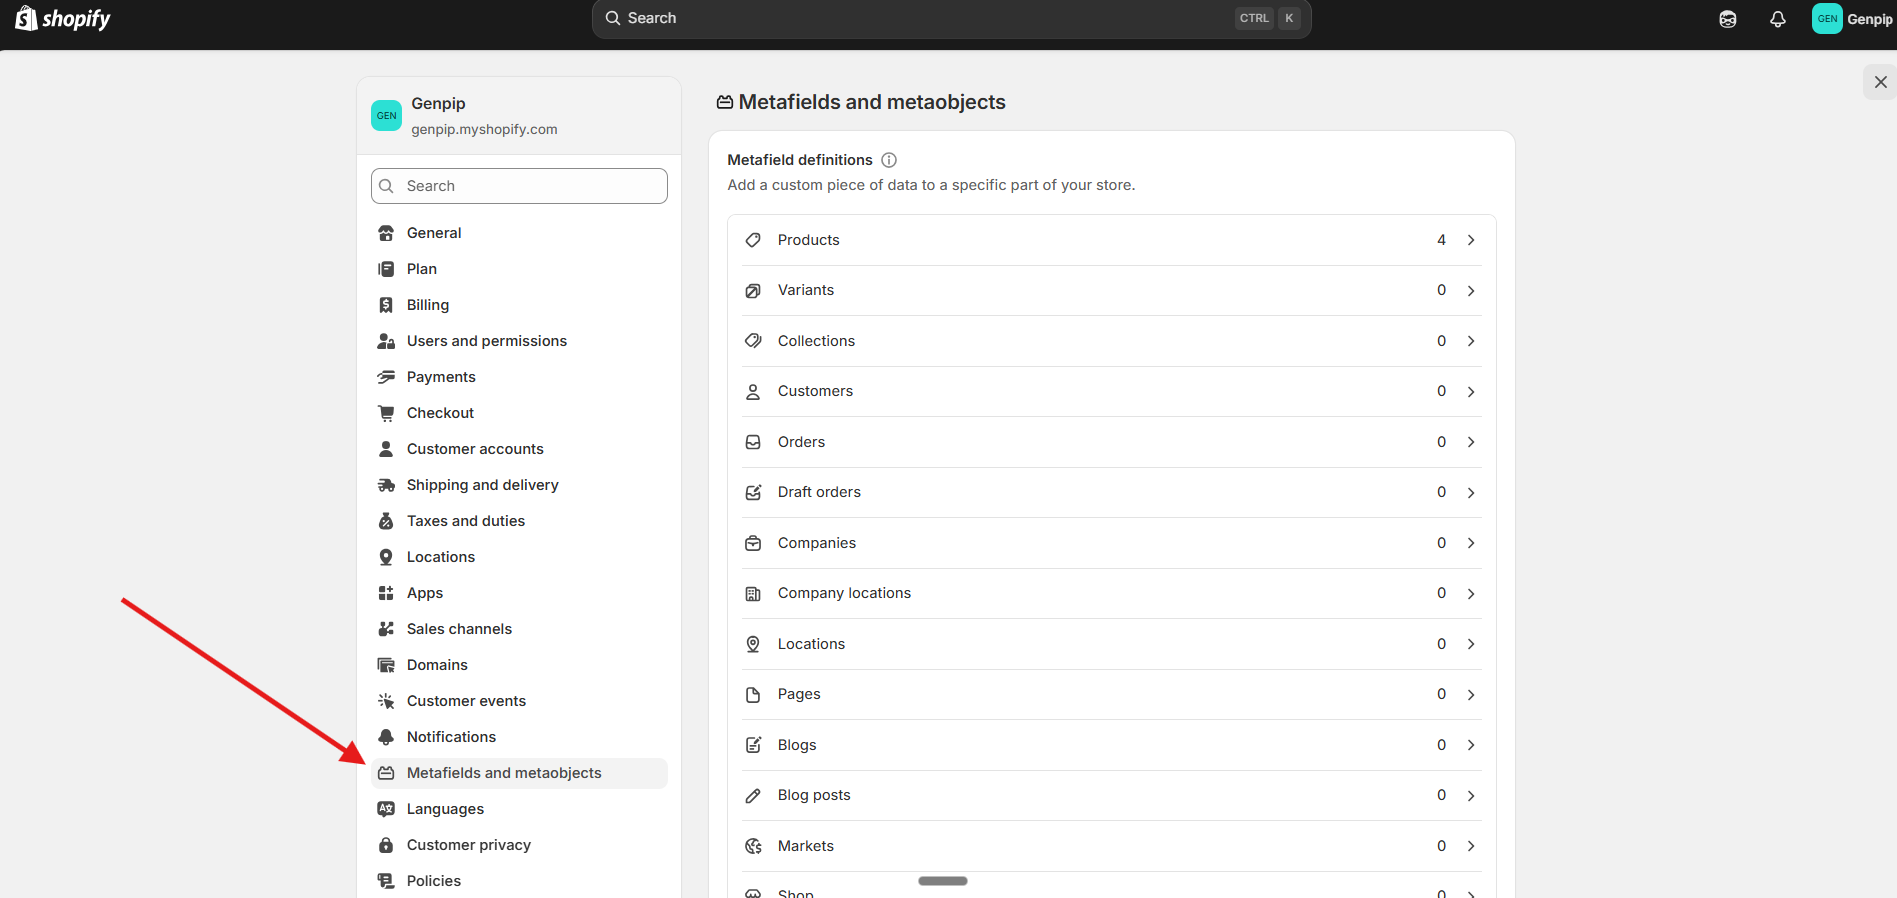
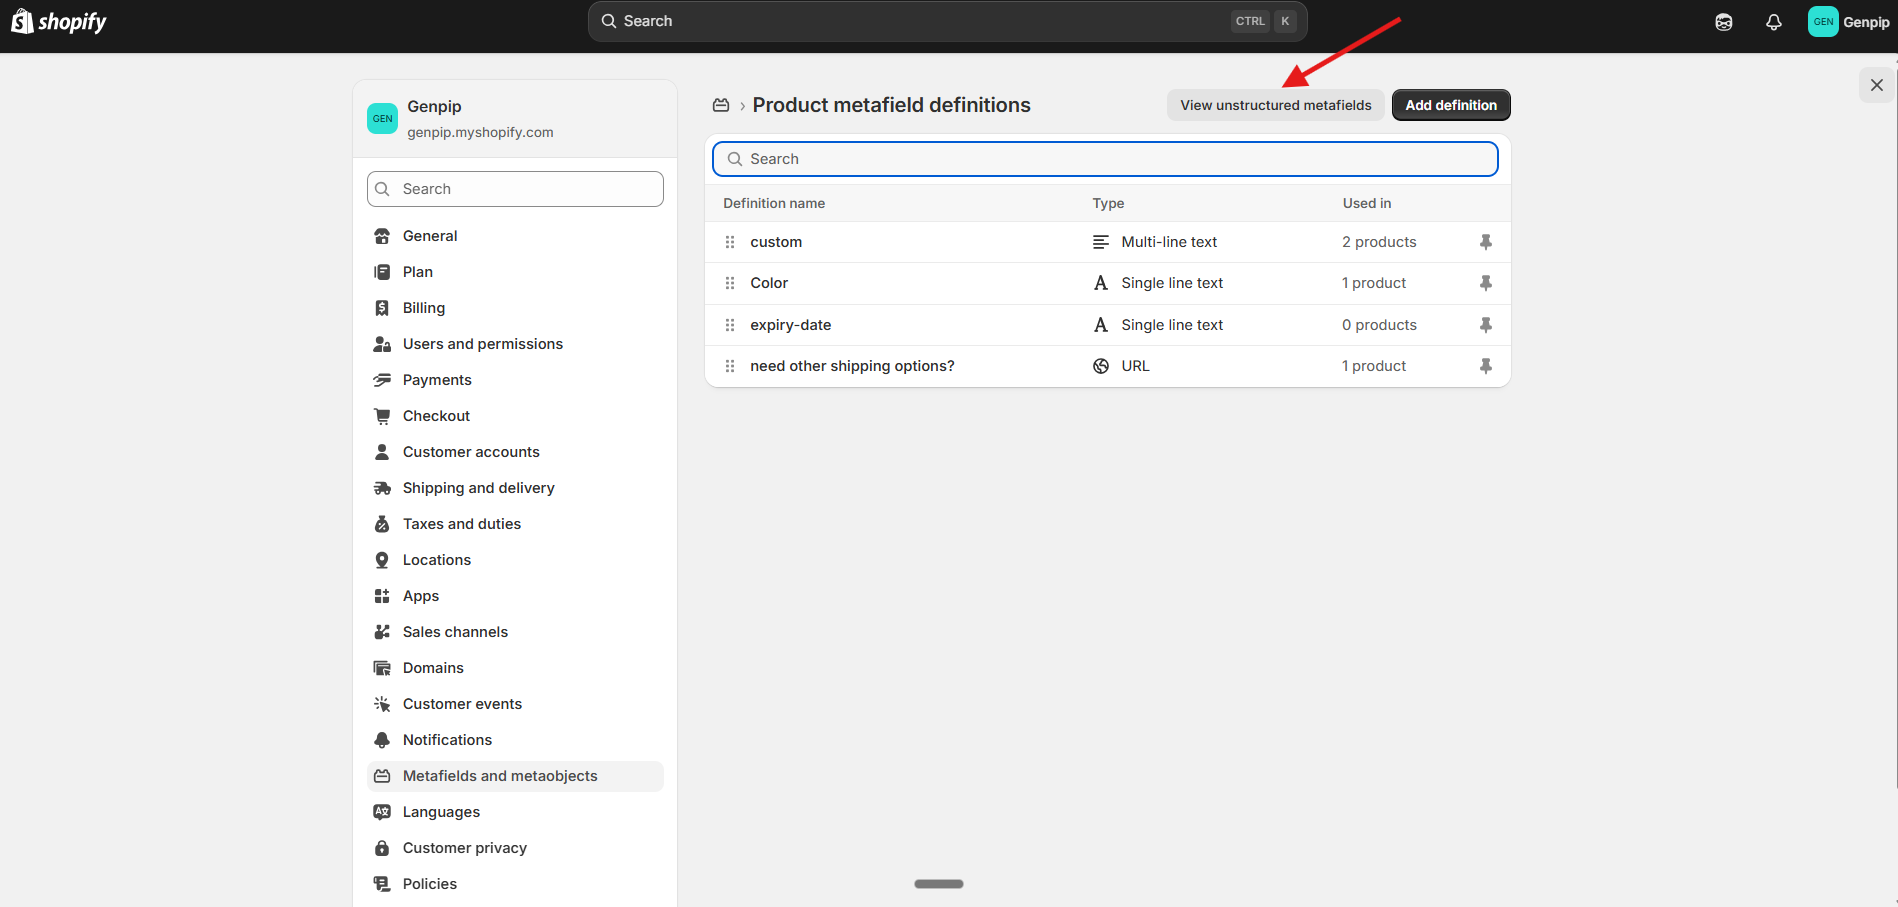
-
Click on Products and then click the button that says View unstructured metafields.
-
Here, you will see the data Marketcube has pushed (e.g.,
custom.size).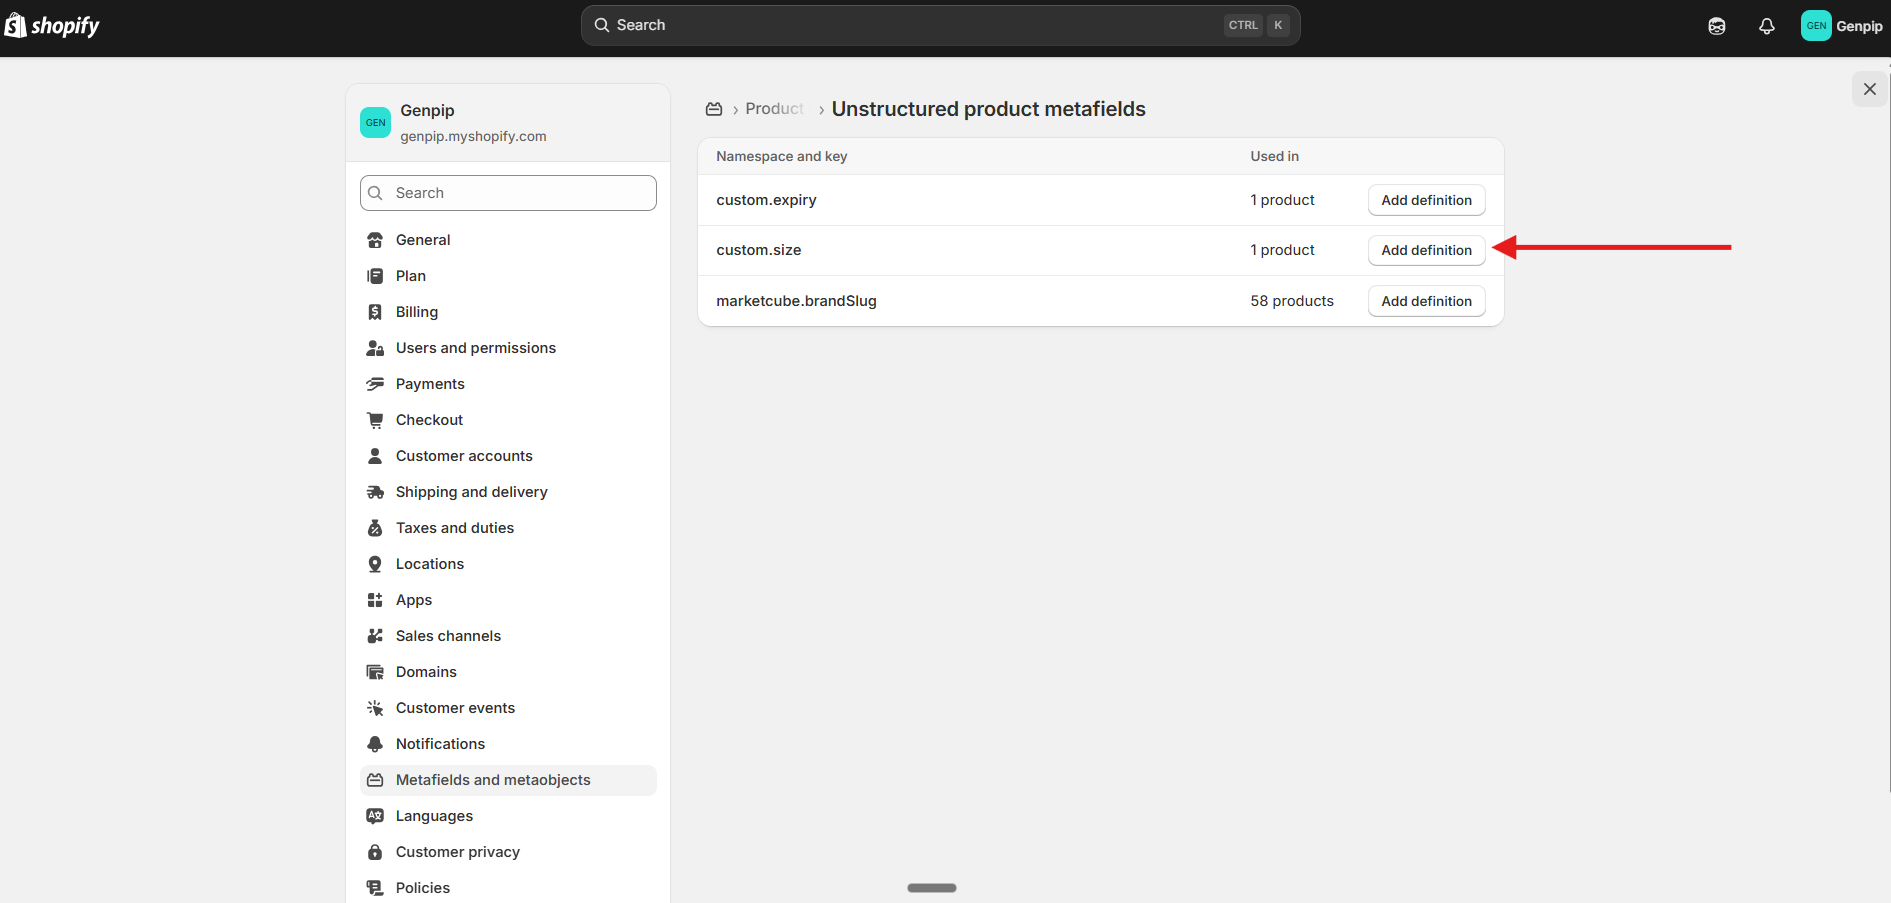


2. Create the Definition:
- Click the Add definition button next to the field you want to structure.
3. Select the Correct Type:
- For Multi-Select Dropdowns: If you used the Marketcube multi-select dropdown feature, the data is often sent as text. Select Multi-line text or Single line text as the type in Shopify.
- (Note: Ensure "List of values" is only selected if your theme specifically requires it, otherwise standard Text is the safest option for syncing).
4. Save:
- Click Save. Your Marketcube metafield is now "Structured" and can be connected to your theme blocks or used for filtering.

Important Note:
The article assumes you are creating a brand new metafield in Marketcube that Shopify has never seen before. In that case, Shopify holds it as "Unstructured" until you define it.
If you have the Metafields defined in your Shopify Admin (Structured), and you copy and past the Namespace and Key exactly from Shopify into Marketcube. It will automatically come as structured; it map the data directly to your existing fields.
