
How to configure ShippyPro?
In this article, we will show you how to configure and enable the ShippyPro settings in Marketcube.
ShippyPro shipping rates are set up by the operator. So the rates updated by the operator on ShippyPro will only flow in Marketcube.
Steps to configure ShippyPro :
1. Log in as an Operator.
2. Under the Settings tab, Click on Fulfilments >> Click Show >> Click Fulfilment.

3. ShippyPro is a dropship model, so the operator needs to select Dropship. By default, Marketcube have enabled dropship.

4. Click on the Dropship Tab to Setup.

5. Select Third-Party Shipping option and from the dropdown (Highlighted in the screenshot). select ShippyPro.
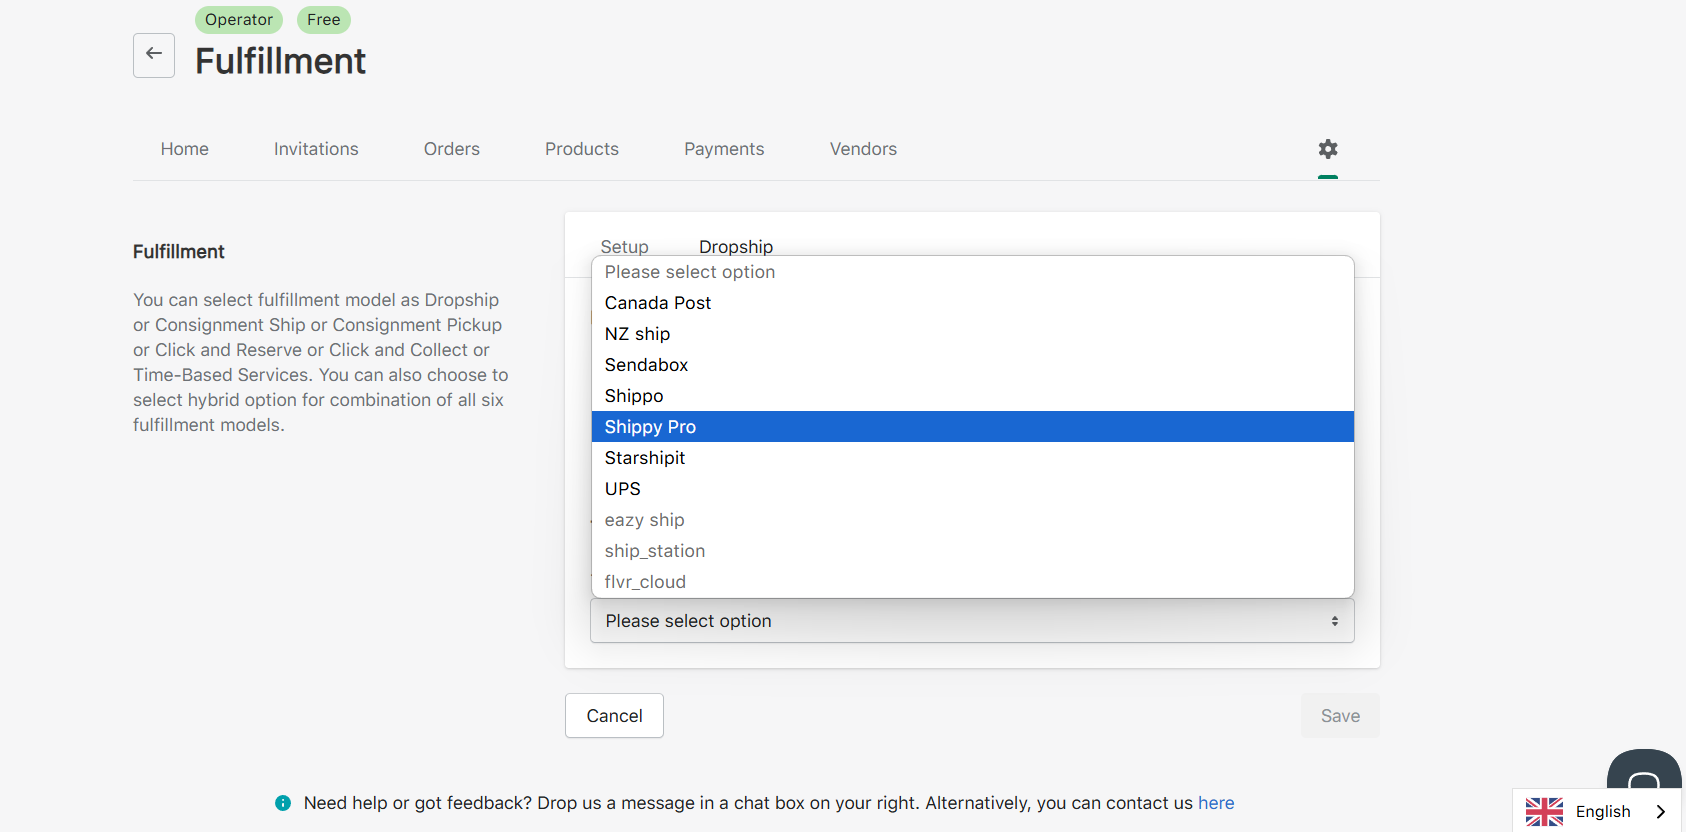
6. Add the ShippyPro API Keys and Click on the Save button to save the fulfilment settings successfully. Operators can find this API keys from their ShippyPro Dashboard.
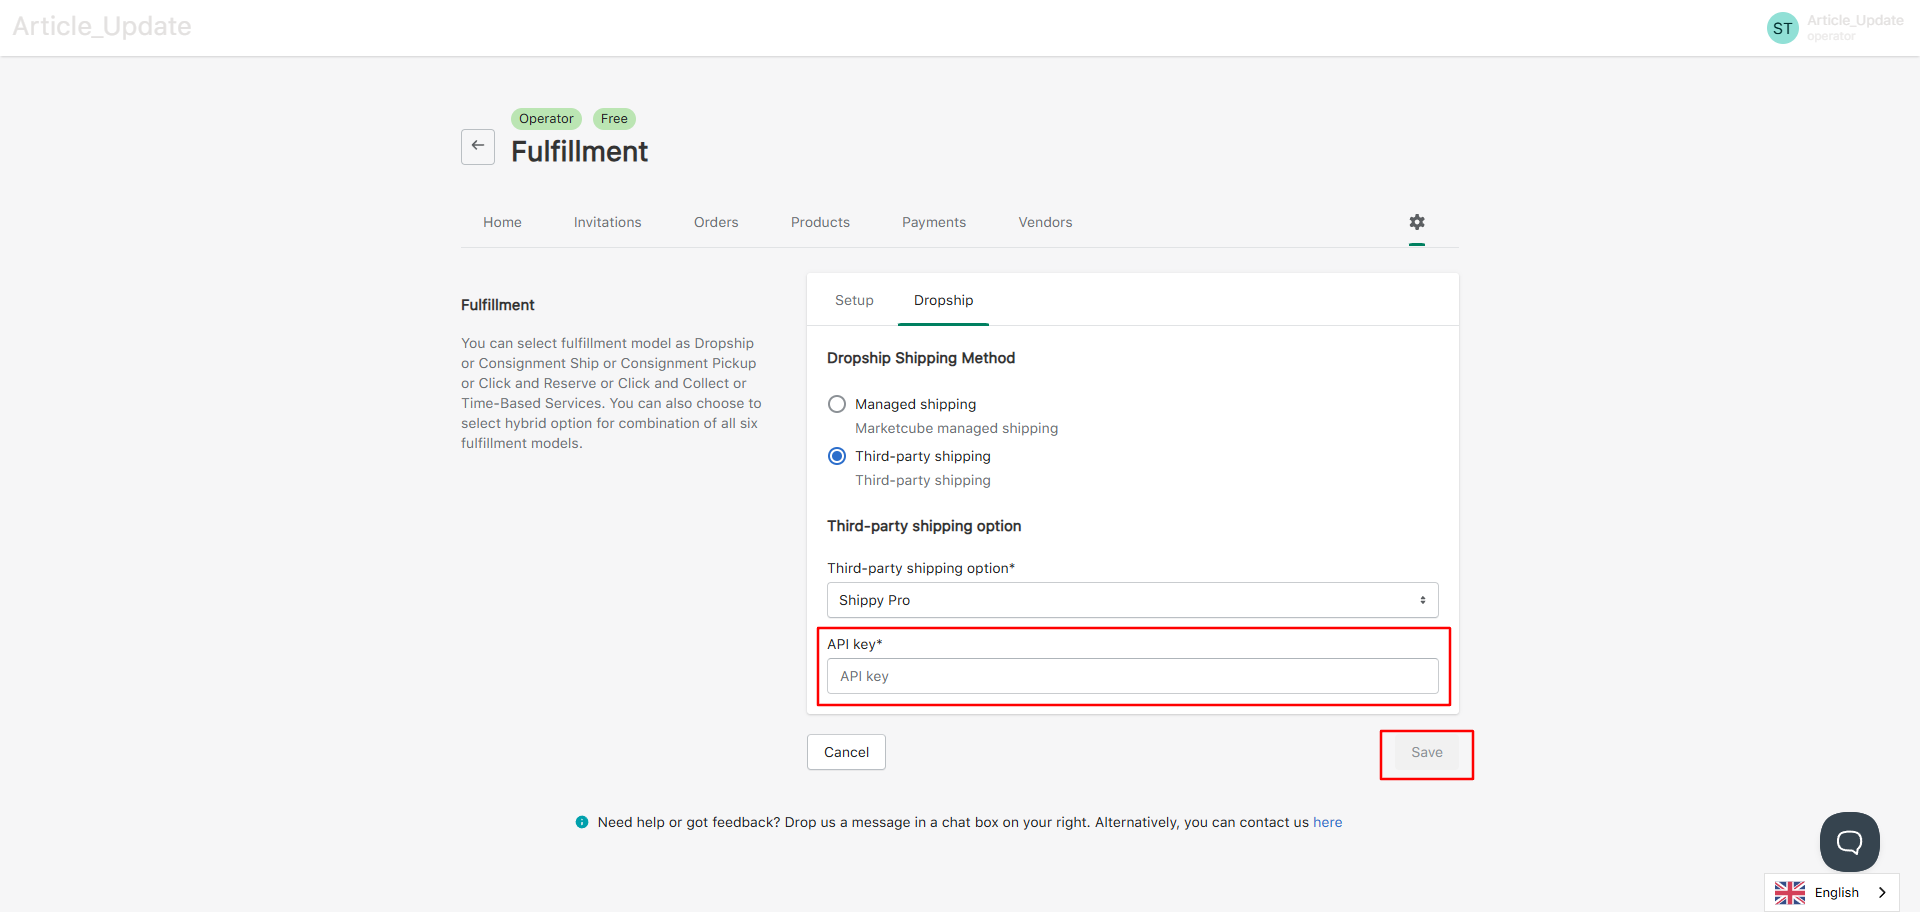
7. This setting will ensure when your customer buys a product on your Shopify store, shipping rates that have been set up on ShippyPro will be levied.
Key points to remember:
1 . ShippyPro will use the Operator API Keys.
2. In order to use ShippyPro rates, operator/ vendor needs to add weight in the products as it is mandatory for ShippyPro rate calculation.
3. If weight has not been added in the products then by default Marketplace will consider the weight of the product to be 0.01 Kg.
4 . If the operator/vendor has not set weight in Marketcube and have it set up on ShippyPro , that weight will be levied.
5. We have a capping of 1000 Kg on maximum product weight which can be updated if the operator contacts Marketcube team.
6. Physical products box should always be checked at the time of adding products in order to use this functionality.
Got more questions? Use the chat on your right or email support@marketcube.io to get in touch.