How to configure Shippo as fulfillment in Marketcube.
In this article, we will discuss Shippo Integration as a fulfilment model and how to set it up.
How to configure Shippo:
1. Log in as an Operator>> Click on the Settings Icon >> Navigate to Shipping and Fulfillments >> Click Show >> Click Fulfilment.

2. Select Dropship >> Click on Submit.

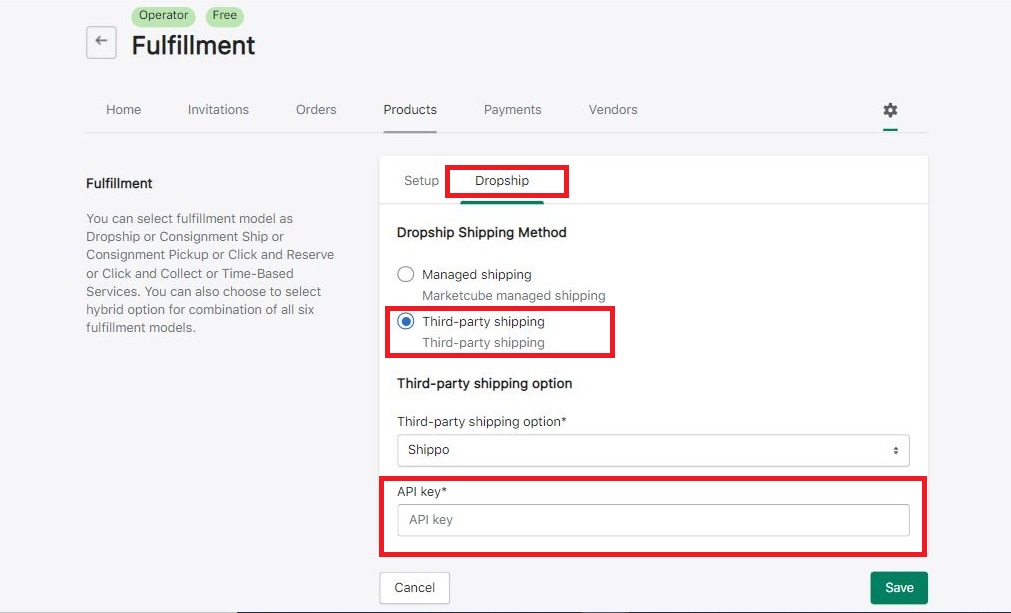
3. Then a Dropship tab will open >> Under Dropship shipping method select Third-party shipping >> Click on the dropdown box for Third-party shipping option >> Select Shippo >> Enter API Key* >> Click on Save.
4. "Autofulfill orderline once the shipping label is generated " is a checkbox. When this is selected the order will automatically be fulfilled in which the condition of the payment should always be in Paid status.
- "Custom shipping rate at the time of checkout" is also a checkbox. If this is not selected, then the live rates will not be calculated but it can be used to generate the shipping label. If this is selected, the live rates will be displayed.
- In the " Carrier option" field you can select a default carrier option. This will be used as a carrier for all the vendors for whom any specific carrier service has not been selected by the operator.

5. Using the option "Select carrier for associated vendors", the operator can select the carrier service which will be associated with the respective vendor.
- Custom Shipping Rate Name- Using this option the operator can update the custom shipping rates name which will be visible to the end customer at the time of checkout.

1. Once an order is placed, it will be listed under the Orders tab on Marketcube for both the operator and vendor.

2. The operator or vendor needs to accept the order to process it by Clicking on Manage Line Item for the order then click Accept order line.
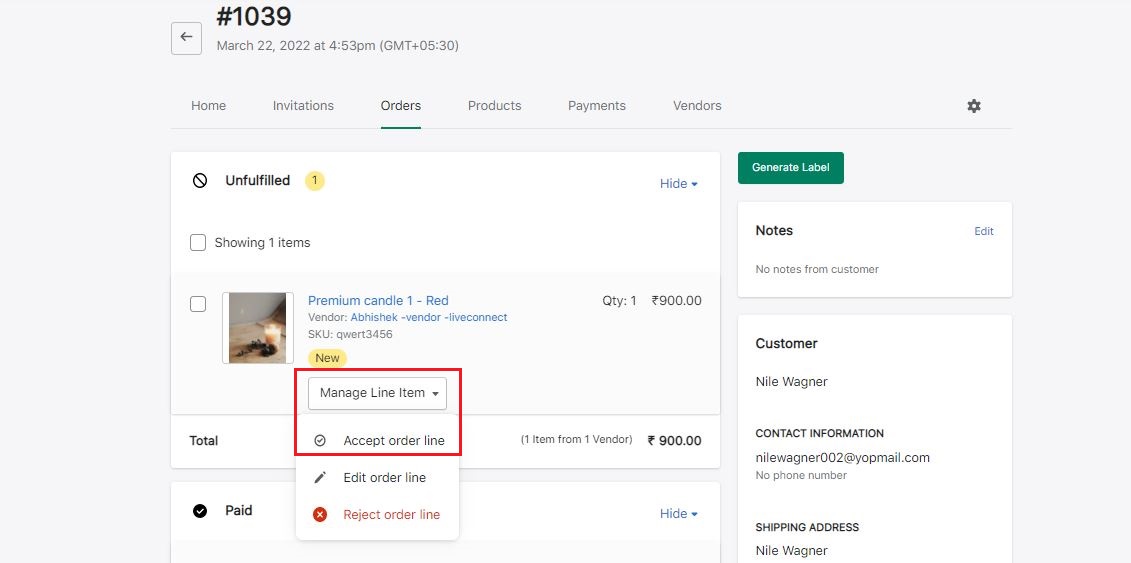
3. Once the operator or vendor clicks on the Accept order line the order is accepted and the Generate Label button is enabled.

4. How to Generate and Download shipping labels.
Operator's End
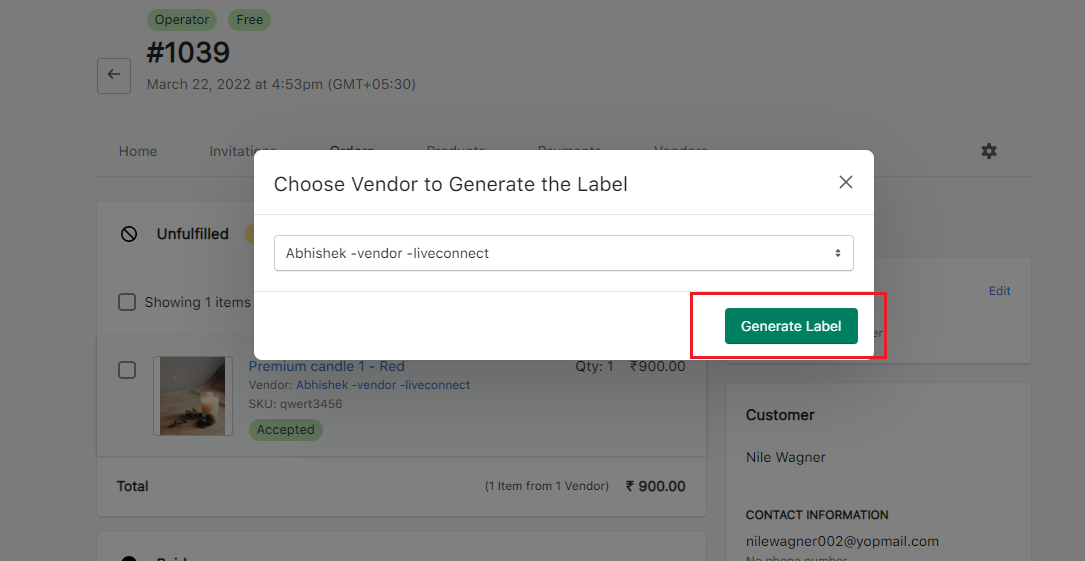
- Once the operator clicks on the Generate Label button. There will be a new window that pops up, where the vendor is selected from the dropdown to generate the label.

- Once the vendor has selected the Generate Label button turns green and Shipping label is generated.
- In order to Download Label the operator needs to click on the download label button.
 Vendor end
- When the vendor clicks on the Generate Label button. The shipping label is generated and the Generate label button changes to Download label.

- Once the Download label button is clicked by the vendor the shipping label is downloaded automatically.

Got more questions? Use the chatbox on the right to get in touch with us or email us at support@marketcube.io.